Lesson 4 - Adding new image formats
In this lesson, we'll add New Image Formats to the icon. This is very important to create several image formats in an icon (especially if you whish to redistribute it) in order to be compatible with all screen configurations (see What is an Icon for more info).
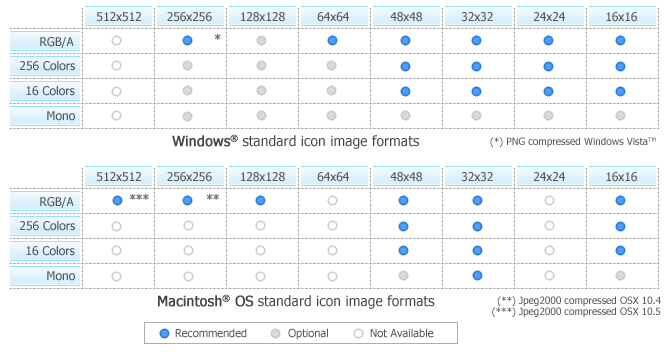
The following table shows the common Windows® and Macintosh® image formats:
![]() IMPORTANT - If you add 24x24 image formats in your icon, it won't be compatible with Windows® 98 and Windows®2000. The icon will display correctly in Axialis IconWorkshop™ but will be considered as invalid by Windows®.
IMPORTANT - If you add 24x24 image formats in your icon, it won't be compatible with Windows® 98 and Windows®2000. The icon will display correctly in Axialis IconWorkshop™ but will be considered as invalid by Windows®.
In this tutorial we'll choose to comply with Windows® XP standard icon formats. We won't add the 256x256 Alpha format which is not supported by Windows® XP (we recommend it for Windows Vista™). So we'll add the following images:
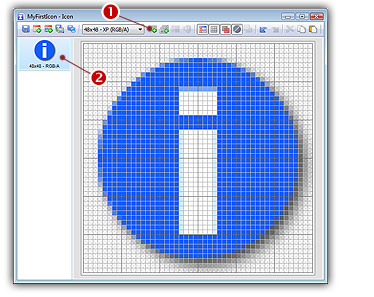
48x48 - RGB with Alpha Channel (already done)
32x32 - RGB with Alpha Channel
16x16 - RGB with Alpha Channel
48x48 - 256 colors
32x32 - 256 colors
16x16 - 256 colors
32x32 - 16 colors
16x16 - 16 colors
Adding a new icon format based on the current image
1. Select Draw/New Image Format or press Ins. You can also click on the button (![]() ) in the local toolbar or right-click in the Image Format List (
) in the local toolbar or right-click in the Image Format List (![]() ) then choose New Image Format.
) then choose New Image Format.
2. A Dialog box Add a New Windows® Image Format opens:
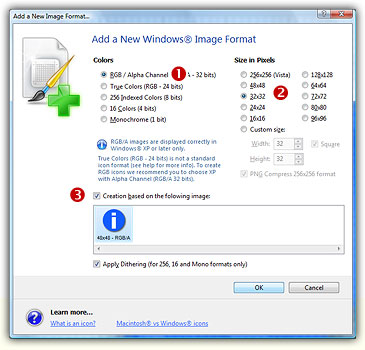
3. In the Colors (![]() ) and Size groups (
) and Size groups (![]() ), Axialis IconWorkshop™ proposes you to create the next missing image format (based on the recommended Windows® image formats - see the above table). Leave the current selection: "RGB / Alpha Channel" and 32x32.
), Axialis IconWorkshop™ proposes you to create the next missing image format (based on the recommended Windows® image formats - see the above table). Leave the current selection: "RGB / Alpha Channel" and 32x32.
4. You can choose to create this new format based on an existing image format. By default, Axialis IconWorkshop™ choose the best existing image format to create the new one. You can change this proposal and choose your own selection (this is not recommended). Be sure the option Creation based on the following image is selected (![]() ).
).
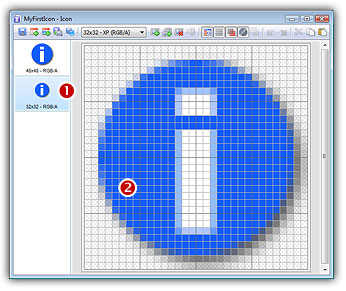
5. When done, Click OK. The new image format is created and the previous image format has been automatically resized. The new format is selected in the list (see below ![]() ) and is displayed in the drawing area (
) and is displayed in the drawing area (![]() ):
):
A Faster way to create a new format
4. If you want to create quickly a new standard image format, just right click on an image format in the list. A menu opens and proposes you to create the next missing format based on the selected image. For example, right-click on the 32x32 Windows® XP image format and choose Create 16x16 Windows® XP Image Format in the menu (see below ![]() ):
):
5. The new image format is automatically created and selected.
Of course you can repeat the same operation to create the other formats. However we prefer to learn you a faster method to create all the other formats on one operation (see below).
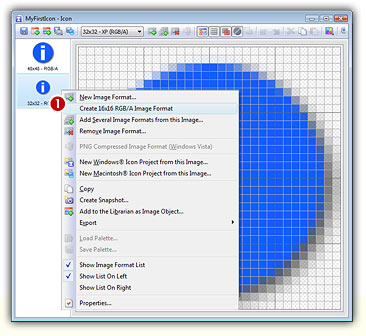
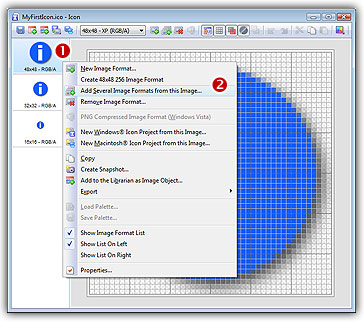
Adding several formats in one operation
6. Right-click on the 48x48 Windows® XP format in the list of available icon formats (![]() on the left of the editor window), a context menu opens, select Add Several Image Formats from This Image (see below
on the left of the editor window), a context menu opens, select Add Several Image Formats from This Image (see below ![]() ).
).
7. A new dialog box opens. This will permit you to add several formats in one step based on the image you've selected in step 6 (in our case 48x48 RGB/A).
![]() Remark - As you can see, the format 256x256 is also proposed but the image has poor quality. This is because it has been created from a smaller original image (48x48 RGB/A). This operation is called "upscaling". It always produce bad results and is not recommended.
Remark - As you can see, the format 256x256 is also proposed but the image has poor quality. This is because it has been created from a smaller original image (48x48 RGB/A). This operation is called "upscaling". It always produce bad results and is not recommended.
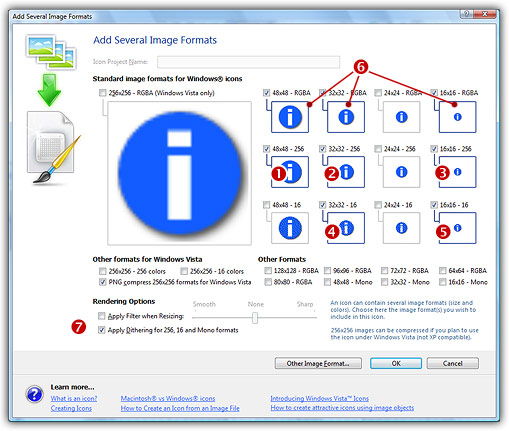
8. Select the following formats (click directly on the preview image)
![]() 48x48 - 256 Colors (
48x48 - 256 Colors (![]() )
)
![]() 32x32 - 256 Colors (
32x32 - 256 Colors (![]() )
)
![]() 16x16 - 256 Colors (
16x16 - 256 Colors (![]() )
)
![]() 32x32 - 16 Colors (
32x32 - 16 Colors (![]() )
)
![]() 16x16 - 16 Colors (
16x16 - 16 Colors (![]() )
)
We don't select any format larger than 48x48. You can just ignore (select or not) the image formats already present in the image (![]() ). You can also apply or not the dithering option to the 256/16 color images (try
). You can also apply or not the dithering option to the 256/16 color images (try ![]() and see the results in the preview images).
and see the results in the preview images).
7. When done click OK. The formats are automatically created:
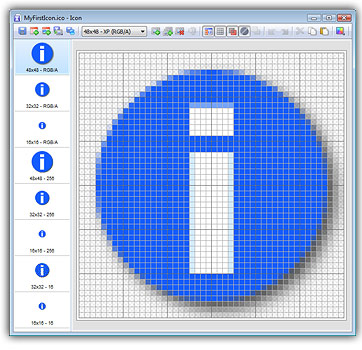
![]()
![]() Lesson 5 - Saving the icon, storing it in the Librarian
Lesson 5 - Saving the icon, storing it in the Librarian