Lesson 2.3 - Adding the photos
In this lesson, we'll add the photos (slides) to the screensaver. We'll learn 3 different methods to perform this operation. Please follow in sequence the 3 methods as described below. 2 slides will be added with each method for a total of 6 slides.
Method 1 - Add photos from the Slide Properties dialog
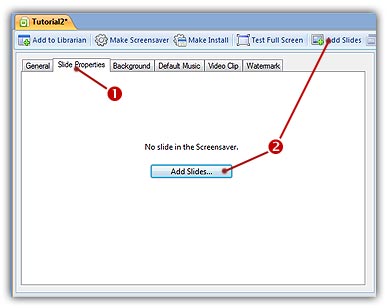
1. In the project window click on the Slide Properties tab (![]() ). The associated dialog box appears (see below).
). The associated dialog box appears (see below).
2. As no slides is actually present in the screensaver, only a Add Slides button is available in this dialog box. Click on this button or click on the associated button in the toolbar (![]() ). You can also choose Project/Insert New Slides (Ins) in the menu.
). You can also choose Project/Insert New Slides (Ins) in the menu.
3. A standard Windows dialog box opens to let you choose the images you want to add as slides. Browse your disks and go to this folder in the Librarian: "...\My Documents\Axialis Librarian\Media Files\Images\Slides\". Select the two following files: "Ian Britton - Bales of Hay.jpg" and "Ian Britton - Mountain Stream.jpg".
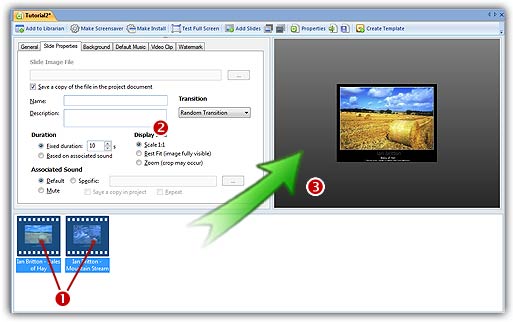
4. Click Open button when done. The 2 files are added in the Slide list as follows (![]() ). The Slide Properties dialog box contents has changed, several options appeared (
). The Slide Properties dialog box contents has changed, several options appeared (![]() ). We'll work with them later. Each time you select a slide in the list (
). We'll work with them later. Each time you select a slide in the list (![]() ), the preview (
), the preview (![]() ) and the Properties dialog box (
) and the Properties dialog box (![]() ) changed accordingly.
) changed accordingly.
Method 2 - Add photos from the Librarian window
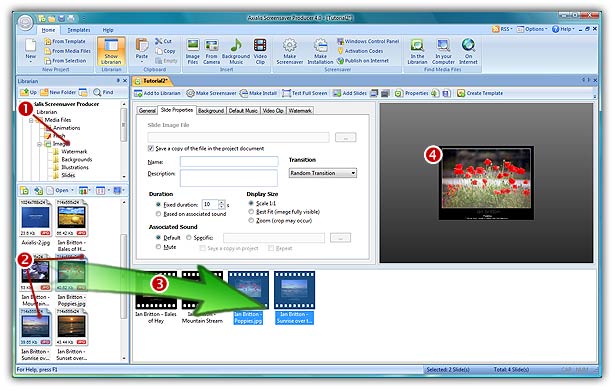
5. In the Librarian window (see below), select the "Media Files\Images\Slides" folder (![]() ). The files contained in this folder are displayed in the list below.
). The files contained in this folder are displayed in the list below.
6. Select the 2 files "Ian Britton - Poppies.jpg" and "Ian Britton - Sunrise over the River Clyde.jpg" in the list (![]() ) and use a mouse drag & drop to place them at the end of the slide list (
) and use a mouse drag & drop to place them at the end of the slide list (![]() ). The 2 files are added in the Slide list. The preview is changed accordingly (
). The 2 files are added in the Slide list. The preview is changed accordingly (![]() ).
).
Method 3 - Add photos using the File Browser window
The application includes a powerful built-in File Browser that permits browsing your disks with image previews. This permits selecting your files and copy/paste them to the project to add slides.
7. Open a new File Browser window: Choose File Menu/Browse Files (Ctrl+Alt+O). A new File Browser window opens over your actual project window (see below).
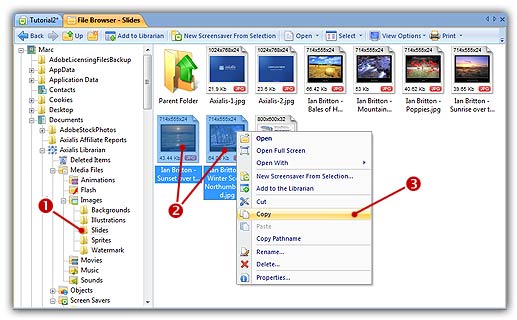
8. In the left pane, browse in Axialis Librarian and select the "Media Files\Images\Slides" folder (![]() ). The files contained in this folder are displayed in the right pane.
). The files contained in this folder are displayed in the right pane.
9. Select the 2 last files "Ian Britton - Winter Scene, Northumberland.jpg" and "Ian Britton - Sunset over the Irish Sea from Blackpool.jpg" in the list (![]() ). Now copy the files in the Clipboard by right-clicking on the selected files and select Copy in the menu (
). Now copy the files in the Clipboard by right-clicking on the selected files and select Copy in the menu (![]() ). You can also click on the Copy button in the Ribbon toolbar.
). You can also click on the Copy button in the Ribbon toolbar.
10. Return to the project document: Select Tutorial2 in the document tabs or press Ctrl+Tab. Choose Paste (Ctrl+V). The 2 files are added in the Slide list. The preview is changed accordingly.
Lesson 4 - Specifying transitions