How to Create Different Color Versions of an Icon...
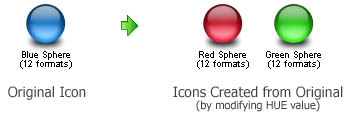
In interesting effect is to create different color versions of the same icons. For example, creating Red and Green versions of our "Blue Sphere" icon:
Opening the existing icon, modifying the image HUE (overall color)
1. Open your original icon file. As example, we'll work on the Blue Sphere icon which is located in the Librarian (if not displayed, press ESC). In the Icons/Tutorial subfolder, select and open the "MySphereIcon.ico" icon.
2. The image file opens in a document window. In the image format list, select the 48x48 Win XP image:
3. Choose Draw/Adjustments Effects/HUE-Saturation or press "U". A Dialog box opens. In the Hue group specify 140 either using the slider or the edit zone. When done, click OK. The sphere color has been changed to Red!
4. Select the whole image (press Ctrl+A) then Choose Draw/Adjustments Effects/HUE-Saturation or press "U". A Dialog box opens. In the Hue group specify 140 either using the slider or the edit zone. When done, click OK.
The sphere color has been changed to Red!
Creating a new icon from this image
5. In the menu choose Edit/New Windows® Icon Project from this Image (Ctrl+Shift+Y).
6. The dialog box New Windows®Icon From Image opens. In the Name group (![]() ), enter the icon project name "Red Sphere". Do not specify any extension.
), enter the icon project name "Red Sphere". Do not specify any extension.
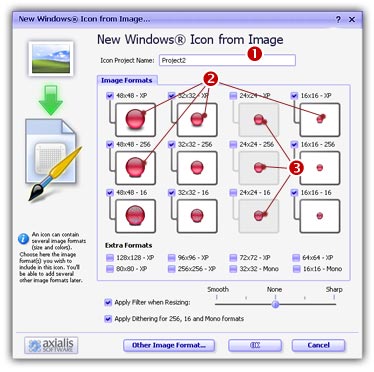
7. In the Image Formats group, select the image formats you whish to add in the icon (![]() ) and unselect the unwanted images (
) and unselect the unwanted images (![]() ). Just click on the image preview to select/unselect. To know more about the desired Windows® standard image format, see What is an Icon topic.
). Just click on the image preview to select/unselect. To know more about the desired Windows® standard image format, see What is an Icon topic.
8. When done, click OK. The icon is automatically created with the various image formats you've selected.
Close the "Blue Sphere" icon (that you've modified to red) without saving it! DO NOT SAVE THIS ICON. Respond NO to the question "Saving Changes you Made?".