Lesson 3 - Adjusting the icon image
In this lesson, we'll modify the icon image we've drawn in Lesson 2 using some of the Adjustment Tools available. These tools do NOT permit you to draw something but to modify appearance of an existing image (brightness, contrast, hue, size, rotate...).
Changing the brightness and contrast of our icon
1. Select the whole image: Use the selection tool (upper-left button of the tool palette) and select the whole icon using Drag & Drop or Press Ctrl+A. When done, an animated dashed rectangle has been created.
![]() All adjustments apply to the selection only.
All adjustments apply to the selection only.
2. Choose Draw/Adjustments Effects/Brightness-Contrast or press "B". A Dialog box opens:
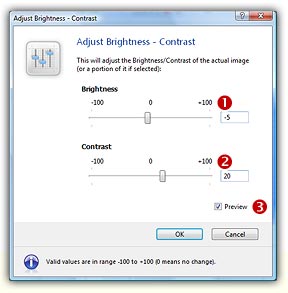
3. In the Brightness group (![]() ) specify -5 either using the slider or the edit zone. In the Contrast group (
) specify -5 either using the slider or the edit zone. In the Contrast group (![]() ) specify 20. We recommend you to click on the Preview option to see the change in real time in the editor and preview windows. When done, click OK. The image has been adjusted (a stronger blue color).
) specify 20. We recommend you to click on the Preview option to see the change in real time in the editor and preview windows. When done, click OK. The image has been adjusted (a stronger blue color).
Moving the image
4. Select the image: Use the selection tool (upper-left button of the tool palette) and select the whole icon using Drag & Drop or Press Ctrl+A. When done, an animated dashed rectangle has been created.
5. We want to move the image by one pixel in the upper-left direction.
Using the mouse: Move the mouse pointer over this selection area. The pointer automatically switches to a four-arrow cursor (![]() ). Now left-click in this area (keep the button pressed) and move your mouse by one pixel up and one pixel left.
). Now left-click in this area (keep the button pressed) and move your mouse by one pixel up and one pixel left.
Using the keyboard: Press the Up Arrow key and the Left Arrow key once.
![]() By doing this, you've transformed the selected portion in a Floating Selection. A floating selection can be moved over the rest of the image preserving the transparent area. When you've finished moving this selection you must apply it by cleft-clicking anywhere in the image.
By doing this, you've transformed the selected portion in a Floating Selection. A floating selection can be moved over the rest of the image preserving the transparent area. When you've finished moving this selection you must apply it by cleft-clicking anywhere in the image.
Creating a shadow behind the icon (Windows® XP style)
6. Select the image: Use the selection tool (upper-left button of the tool palette) and select the whole icon using Drag & Drop or Press Ctrl+A. When done, an animated dashed rectangle has been created.
7. Choose Draw/Adjustments-Effects/Drop Shadow or press "D". A dialog box opens. To get a better idea of the adjustments you're doing, we recommend you to activate the Preview option. It permits you to see the changes in background (editor and preview windows).
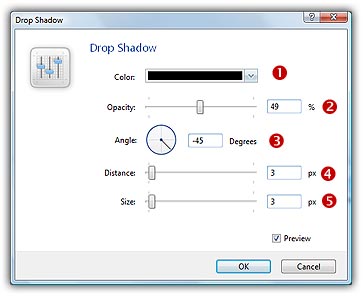
8. In Colors (![]() ), select the Black color. Click on the down arrow to choose in a list of predefined colors or click the color rectangle to specify the color using a dialog box. In Opacity (
), select the Black color. Click on the down arrow to choose in a list of predefined colors or click the color rectangle to specify the color using a dialog box. In Opacity (![]() ), specify the opacity percent for the shadow: 60%. In Angle (
), specify the opacity percent for the shadow: 60%. In Angle (![]() ), specify the angle of projection for the shadow: 45°. You can specify the angle using the text box or by clicking with the mouse directly in the circle. In Distance (
), specify the angle of projection for the shadow: 45°. You can specify the angle using the text box or by clicking with the mouse directly in the circle. In Distance (![]() ), specify 3 and in Size (
), specify 3 and in Size (![]() ), specify the size of the shadow's gaussian blur: 3.
), specify the size of the shadow's gaussian blur: 3.
9. Click OK, the icon should look like this:
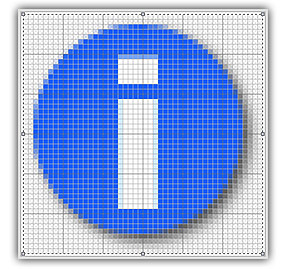
![]()
![]() Lesson 4 - Adding new image formats
Lesson 4 - Adding new image formats