Lesson 5 - Saving the icon, storing it in the Librarian
In this lesson, we'll save the icon we've created in the Librarian. Actually, the icon is loaded in memory but not saved. If the computer is turned off now, your work will be lost. For the moment we'll save it as an ICO file (see What is an Icon for more info regarding icon files).
Adding the icon to the librarian
1. To save this icon to the librarian, you must be sure that the librarian is visible. If the librarian window is not visible (![]() ), check the Librarian button in the main toolbar (
), check the Librarian button in the main toolbar (![]() ) or press ESC.
) or press ESC.
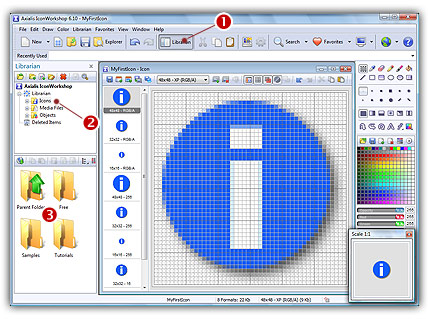
2. Select the folder "Icons" in the Librarian tree (![]() ). This is where we want to save the icon, its contents appears in the zone below (
). This is where we want to save the icon, its contents appears in the zone below (![]() ).
).
3. Choose the File/Add to the librarian or click on the command button in the local toolbar (see below ![]() ):
):
4. A dialog box Add Icon to the Librarian prompts you. In the Name edit zone be sure the name is correct (it propose you the name you gave to the icon project).
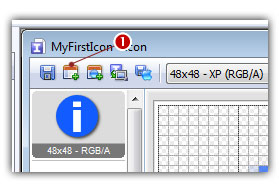
5. When done, click OK. The icon is saved and added to the librarian:

6. Now you can close the Icon Project Document window then open it again by double-clicking on the associated item in the librarian (see above picture).
![]()
![]() Lesson 6 - Creating a new icon from an existing image
Lesson 6 - Creating a new icon from an existing image