Use the Adobe Photoshop Plug-in
To use the Photoshop® to Screensaver Producer plug-in, you must start the Photoshop® application first. The plug-in is accessible from within Photoshop® only.
Use the Photoshop® plug-in
1. Using Photoshop, create your image like shown below (![]() ). For better results we recommend you to create an image with smooth transparency (
). For better results we recommend you to create an image with smooth transparency (![]() ). For example the image below is featured with a drop-shadow effect. If the image contains several layers, they will be merged during the transfer (
). For example the image below is featured with a drop-shadow effect. If the image contains several layers, they will be merged during the transfer (![]() ).
).
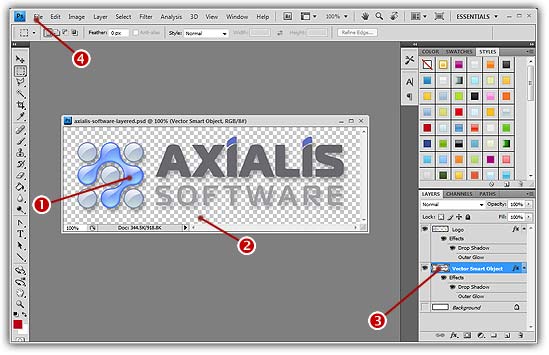
2. In the menu (![]() ), select File/Axialis/Transfer To Axialis Screensaver Producer. The Axialis application automatically starts (or activates if already running in background) and a dialog box prompts you to choose an action:
), select File/Axialis/Transfer To Axialis Screensaver Producer. The Axialis application automatically starts (or activates if already running in background) and a dialog box prompts you to choose an action:
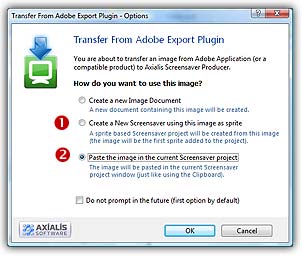
3. Choose Create a New Screensaver using this image as sprite option (![]() ) to create a new screensaver. By choosing this action, you'll add this image as the first sprite in the screensaver. If you want to add this image in an existing (and already opened) screensaver project, select Paste the image option (
) to create a new screensaver. By choosing this action, you'll add this image as the first sprite in the screensaver. If you want to add this image in an existing (and already opened) screensaver project, select Paste the image option (![]() ).
).
4. For example, choose Create a New Screensaver and click OK. A second dialog box opens. Specify the requested information (title, author...) and Click Next. A new screensaver is created with the image added as sprite:
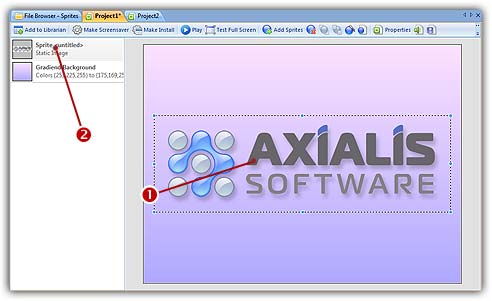
5. The sprite is added in the center of the edit window (![]() ) and is also visible in the sprite list (
) and is also visible in the sprite list (![]() ). Now you can adjust the sprite properties: motion, size & position, collision, transparency... To learn more about sprite screensavers, we recommend you to follow this tutorial.
). Now you can adjust the sprite properties: motion, size & position, collision, transparency... To learn more about sprite screensavers, we recommend you to follow this tutorial.