Lesson 3.3 - Specifying the Flash file
In this lesson, we'll add the Flash file to the screensaver.
Specify the Flash file from the Librarian window
1. In the Librarian window (see below), select the "Media Files\Images\Flash" folder (![]() ). The files contained in this folder are displayed in the list below.
). The files contained in this folder are displayed in the list below.
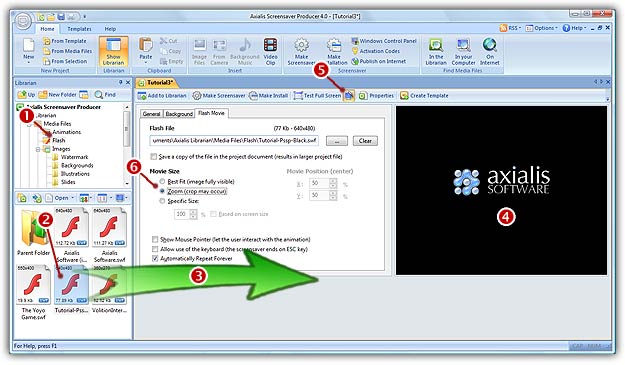
2. Select the file "Tutorial-Pssp-Black.swf" in the list (![]() ) and use a mouse drag & drop to place it in the document window (
) and use a mouse drag & drop to place it in the document window (![]() ).
).
3. The Flash movie is automatically added to the project. In Flash File field you see the full pathname to the file you're about to add. Check that this is the correct file.
4. If you want to see an animated preview of the Flash screensaver window (![]() ), check the Preview icon in the local toolbar (
), check the Preview icon in the local toolbar (![]() ).
).
Changing the Flash file (another method to specify the file)
5. Once the file has been specified (even if no file has been added yet), you can browse your disks using a Windows standard dialog box and specify any SWF file. In the Flash Movie dialog box (click the tab if necessary), click on the [...] button. A standard Windows dialog box opens to let you choose the file you want to add. Browse your disks, select a file and click Open.
6. The full pathname is added in the Flash File field and you see the movie in the Preview window.
Lesson 4 - Specifying display settings