Create a Windows® icon from an image File...
An interesting feature of Axialis IconWorkshopä is to create an icon from an existing file. Some image formats support 32 BPP alpha channel transparency which is very interesting to create hi-quality RGB/A images in icons. The following image formats are supported:
BMP - Windows® bitmap (32 BPP alpha channel transparency supported).
PNG - Portable Network Graphic (32 BPP alpha channel transparency supported).
PSD - Photoshop (32 BPP alpha channel transparency and layers supported).
JP2 - JPEG 2000 (32 BPP alpha channel transparency supported).
JPG - JPEG
TGA - Targa
GIF - Compuserve GIF
Others - Various other formats supported: TIFF, PCD (PhotoCD), PIC (Apple PICT), PCX (Zsoft), WMF (Windows® MetaFile)
Open the image file in IconWorkshop™
1. Choose "File/Open", browse your folders and select your file (Windows® standard dialog box).
or
Choose "File/New/File Browser" or press Ctrl+Shift+O. A built-in Axialis file explorer window opens. Browse your disks, see the thumbnail preview and double-click the image file you wish to open.
or
In the Recently Used zone (in the main toolbar), type the full pathname of the image file you wish to open then hit Enter.
2. The image file opens in a document window.
![]() Axialis IconWorkshop™ will convert images to 32 bpp with transparency when possible. This is much more convenient to create icons. The following image formats can include transparency: Photoshop® PSD, PNG, RGB, GIF, JPEG 2000 and WMF.
Axialis IconWorkshop™ will convert images to 32 bpp with transparency when possible. This is much more convenient to create icons. The following image formats can include transparency: Photoshop® PSD, PNG, RGB, GIF, JPEG 2000 and WMF.
Add transparency
Transparency is important when creating icons. It permits to display an icon over a background image without fully hiding it. Parts of the background image are visible through the transparent areas of the icon. Transparency can be total (1-bit mask, in GIF for example) or partial (8-bit mask, a.k.a Alpha Channel, in PNG or JPEG2000 for example). Partial transparency (RGB/Alpha Channel) produces better results when displaying icons. See what is an icon to learn more.
The following image formats support transparency: Photoshop® PSD, PNG, RGB, JPEG 2000 and WMF. GIF support only total transparency. Axialis IconWorkshop™ permits to convert images to 32 BPP (RGB/Alpha Channel) which is much more convenient to create icons.
If your image already contains transparency or don't want to use transparency, go directly to step 6.
3. Before adding transparency to your image, we strongly recommend to convert it to RGB/A 32 BPP if needed: choose Image/Convert to True Colors with Alpha Channel (32 bits). If the image is large, we recommend to reduce its size to 512x512 or smaller: choose Image/Image size. To learn more about these two features, read Change image size and color depth.
4. Select a transparent color in the palette. To do so, adjust the opacity to 0 (![]() ):
):
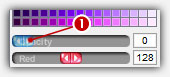
5. Now use the different drawing tools to make transparent areas (flood fill, brush, circle, rectangles...).
Create an icon from this image
6. Before proceeding, we recommend you to select the portion of image you whish to use to create your icon. If you leave too many transparent areas around your image, the visible part of your icon will be too small.
7. Select the portion of image: Use the selection tool (upper-left button of the tool palette) and select the portion of image you whish to use (do not cut the shadow if there is one around the object). When done, an animated dashed rectangle has been created.
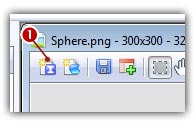
8. When the selection is done, choose Image/Create Windows® Icon from Selection or press "I" or click the first command button in the local toolbar (![]() ):
):
9. The dialog box New Windows® Icon From Image opens (see below). In the Name group (![]() ), enter the icon project name. Do not specify any extension.
), enter the icon project name. Do not specify any extension.
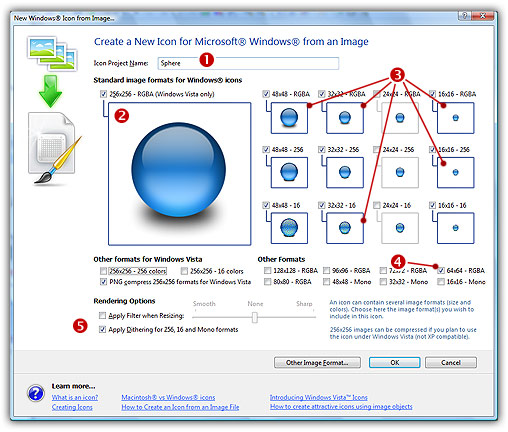
10. In the Image Formats group, select the image formats you whish to add in the icon (![]() ) and unselect the unwanted images (
) and unselect the unwanted images (![]() ). Just click on the image preview to select/unselect. To know more about the desired Windows® standard image format, see What is an Icon topic.
). Just click on the image preview to select/unselect. To know more about the desired Windows® standard image format, see What is an Icon topic.
11. In the Extra Formats group, select the optional image formats you whish to add in the icon. The following table shows the common Windows® image formats:
12. To get the best results possible, you can also apply a filter when resizing RGB/A images and a dithering option to the 256/16 color images (try ![]() and see the results in the preview images).
and see the results in the preview images).
13. If you wish to start creating your icon with an unlisted format, click the Other Image Format button.
14. When done, click OK. The icon is automatically created with the various image formats you've selected.