Create a new image strip from scratch
IconWorkshop automatically opens existing image strips but also permits creating new image strips from scratch.
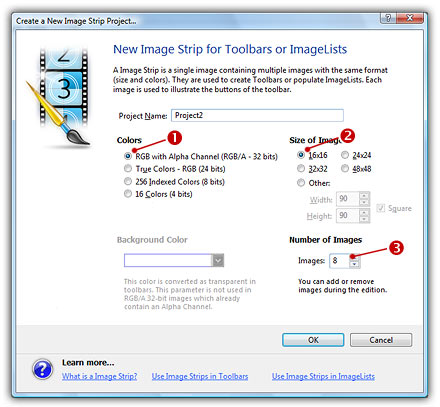
1. Select File/New/Image Strip for Toolbar, a dialog box opens:
2. In Colors, select the color depth of your image (![]() ), in Size of Image, specify the size of the icons included in the image strip (
), in Size of Image, specify the size of the icons included in the image strip (![]() ).
).
3. In Number of Images (![]() ) specify the number of image you want to initially create in the image strip. You'll be able to add/remove/copy images during the edition.
) specify the number of image you want to initially create in the image strip. You'll be able to add/remove/copy images during the edition.
4. If your image has a color depth of 24 BPP or less, you must also specify a color to encode the transparency during saving. Specify a color that you won't use in your icons.
5. Click OK, your new image strip is created.
REMARK - If you created a 24 BPP or less, the transparent color that you specified is not visible. It is replaced by a transparent texture (chessboard) for better visual aspect during edition. The transparent color will be applied when the image will be saved.