Step 7 of 9 - Specify the preview parameters
When the user select a screensaver in Windows Control Panel (![]() ), it appears in a small preview window (
), it appears in a small preview window (![]() ):
):
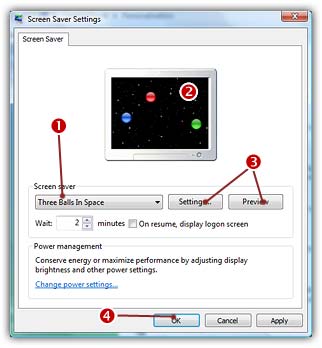
By default, a reduced animated preview is displayed but you can also specify a custom or a standard static image. The Step 7 dialog box looks like this:
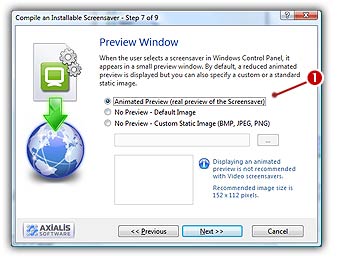
Specify an Animated Preview
1. If you want to display a standard Animated Preview Window (small sprites, flash, video), choose the Animated Preview option (![]() ).
).
2. When the user will select the Screensaver in the Windows Control Panel, it will display a small moving preview of the screensaver. When done, click Next.
IMPORTANT: We DO NOT recommend using a classic animated preview for Video based screensavers (especially for large video files). Some Windows versions/configurations may cause the screensaver preview to crash under special circumstances.
Specify a Static Preview Image
If you don't want the animated preview, you can choose to display a static image. Two options are available for the static image:
1. Select No Preview - Default Image if you don't want to design an image by yourself. In this case, the application will display a default image (a computer screen displaying a Screensaver).
2. Select No Preview - Custom Static Image if you want to specify an image you've designed using an external drawing program. Only BMP, PNG or JPEG files are supported for preview images. If you choose this option you must specify an image file in the area below. You can click the "..." button to browse your disks using a standard Windows dialog box. For better results, we recommend you to resize the image to 152 x 112.
3. When done, click Next.
IMPORTANT: We STRONGLY recommend static preview image for Video based screensavers (especially for large video files). Some Windows versions/configurations may cause the screensaver preview to crash under special circumstances.
![]() Step 8 - Specify an activation code (create a limited version)
Step 8 - Specify an activation code (create a limited version)