Use the Illustrator® Plug-in
To use the Illustrator® to Axialis IconWorkshop™ plug-in, you must start the Illustrator® application first. The plug-in is accessible from within Illustrator® only. Before using the plug-in as detailed in next topic, you need to install it on your computer. The plug-in can be easily installed from within Axialis IconWorkshop™ in one fast and simple operation.
Use the Illustrator® plug-in
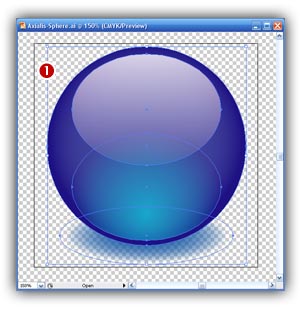
1. First of all, launch Illustrator® and open or create a document. The Illustrator file used in this topic can be downloaded here: Axialis-Sphere.ai
2. In the document, select the objects you want to transfer to Axialis IconWorkshop™ (![]() ). If you don't select objects, the whole document will be transferred.
). If you don't select objects, the whole document will be transferred.
![]() You don't need to launch Axialis IconWorkshop™ before using the plug-in. It will be automatically launched by the plug-in if necessary.
You don't need to launch Axialis IconWorkshop™ before using the plug-in. It will be automatically launched by the plug-in if necessary.
3. Launch the plug-in from the Illustrator menu. For Illustrator versions prior to CS4, the plug-in is visible in Filter/Axialis/Transfer To IconWorkshop. For versions CS4 or later, Objects/Filters/Axialis Software/Transfer To IconWorkshop..
4. A dialog box opens (see below). If you have selected some objects in the document, you can choose to export only these objects or the whole document (![]() ).
).
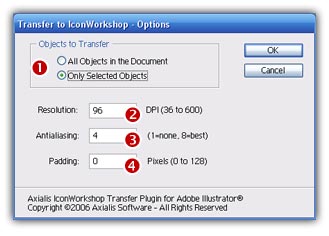
5. During the transfer, the vector objects will be rasterized (i.e. converted to bitmap images composed of pixels). To perform this, you need to specify the Resolution (![]() )of the image to produce in DPI (Dots Per Inch). Based on the size of your vector document and the value you specify here, the size of the final bitmap image will be automatically calculated. For example, if your vector object is 2x2 inches and if you specify 128 DPI, the final image will be 256x256.
)of the image to produce in DPI (Dots Per Inch). Based on the size of your vector document and the value you specify here, the size of the final bitmap image will be automatically calculated. For example, if your vector object is 2x2 inches and if you specify 128 DPI, the final image will be 256x256.
6. Specify a value for the Antialiasing (![]() ). This parameter permits to create a smoother image, especially on edges. The higher, the better, the longer to compute. Finally, specify a Padding value (
). This parameter permits to create a smoother image, especially on edges. The higher, the better, the longer to compute. Finally, specify a Padding value (![]() ) to create a transparent border around the image. This will avoid to have the objects placed directly on the border of the image. A small border permit to create nicer icons, especially when creating the small image sizes.
) to create a transparent border around the image. This will avoid to have the objects placed directly on the border of the image. A small border permit to create nicer icons, especially when creating the small image sizes.
7. When done, click OK. Axialis IconWorkshop™ is automatically launched (or activated if running in background) and the dialog box Install the Illustrator® to Axialis IconWorkshop™ Transfer Plug-in opens (see below).
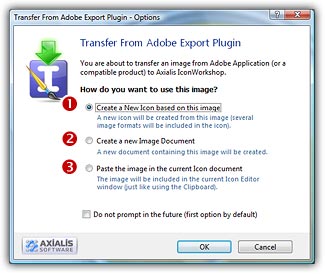
8. The image is about to be transferred in Axialis IconWorkshop™. You can choose one of the following operations: Create a New Icon using this Image (![]() ): You create a new icon with several formats based on the image (see step 4); Create a New Image Document (
): You create a new icon with several formats based on the image (see step 4); Create a New Image Document (![]() ): Axialis IconWorkshop™ opens a new document containing the image. You'll be able to perform various operations on the image (resize, crop, save...) and even create a new icon from a portion of it; Paste the Image in the Current Icon Document (
): Axialis IconWorkshop™ opens a new document containing the image. You'll be able to perform various operations on the image (resize, crop, save...) and even create a new icon from a portion of it; Paste the Image in the Current Icon Document (![]() ): This option is enabled only if an icon document is already opened in Axialis IconWorkshop™. It pastes the image in the current editor area (just like the Clipboard paste operation).
): This option is enabled only if an icon document is already opened in Axialis IconWorkshop™. It pastes the image in the current editor area (just like the Clipboard paste operation).
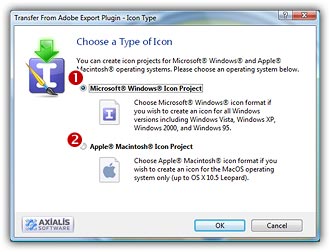
9. If you choose the first option (Create a New Icon using this Image), the following dialog box opens (see below). As Axialis IconWorkshop™ support creation of both Windows® and Macintosh® icons, you're prompted to choose the format. Select option ![]() for Windows® or option
for Windows® or option ![]() for Macintosh®.
for Macintosh®.
10. By choosing Windows®, the following dialog box opens (a similar dialog opens if you choose Macintosh®)
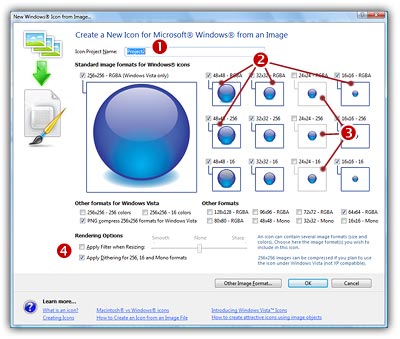
11. In the Name group (![]() ), enter the icon project name. Do not specify any extension.
), enter the icon project name. Do not specify any extension.
12. In the Image Formats group, select the image formats you whish to add in the icon (![]() ) and unselect the unwanted images (
) and unselect the unwanted images (![]() ). Just click on the image preview to select/unselect. To know more about the desired Windows® standard image format, see What is an Icon topic.
). Just click on the image preview to select/unselect. To know more about the desired Windows® standard image format, see What is an Icon topic.
13. You can also apply or not the dithering option to the 256/16 color images as well as add a filter effect to smooth/sharpen the resulting images in RGB/A mode (try ![]() and see the results in the preview images).
and see the results in the preview images).
14. If you wish to start creating your icon with an unlisted format, click the Other Image Format button.
15. When done, click OK. The icon is automatically created with the various image formats you've selected.