Getting Started
The Workspace
Launching IconVectors opens the main workspace, which includes all the tools you need to create and manage icons. The application starts with a new blank icon (if configured), or you can open an existing file.
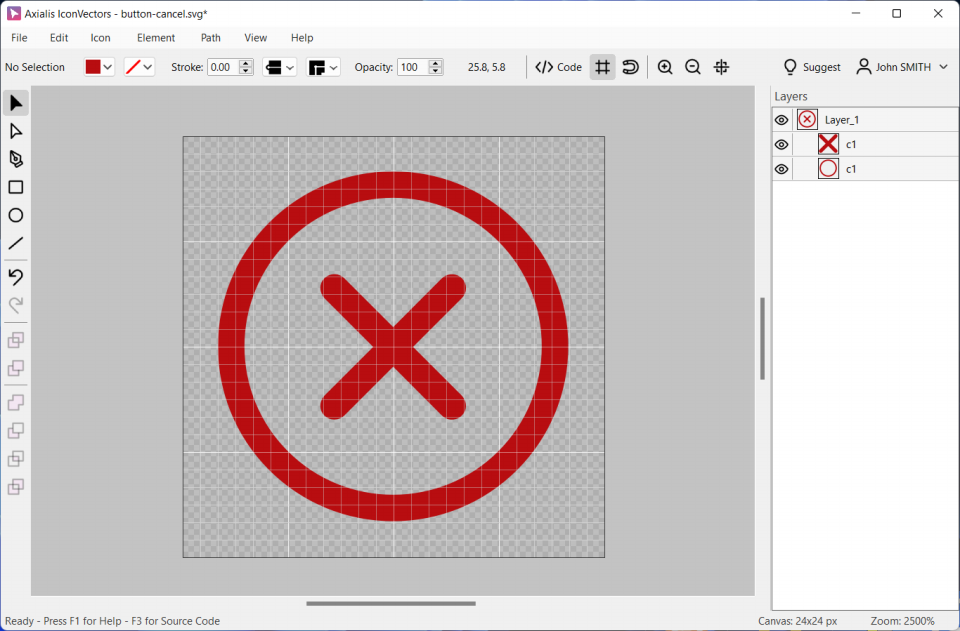

The IconVectors workspace is divided into several functional areas:
Menu bar (top) — Provides access to all commands such as File, Edit, Icon, Element, Path, View, and Help.
Toolbox (left) — Contains drawing and editing tools, such as the selection tool, shape tools, pen, and path editor. Only one tool can be active at a time.
Undo/Redo (left) — In the left toolbar you can undo or redo commands. There is no limit in undo/redo operations.
Canvas (center) — This is where your icon is drawn and edited. It includes a checkerboard background to indicate transparency, along with visible grids and guides.
Control bar (top center) — Displays adjustable properties for the selected element: position, size, color, stroke, opacity, etc.
Layers panel (right) — Lists all the layers and elements in your icon. You can show/hide, group, or rename them for better organization.
Status bar (bottom) — Displays zoom level, canvas size, and helpful hints or shortcuts.
Hint
If you prefer a dark interface, you can change the theme by going to , then choosing a color theme under the General tab.
The Canvas and the Icon
The canvas is the space in which your icon is drawn. You can zoom in/out, show or hide the grid, and snap elements for alignment.
Your icon itself consists of one or more vector elements, such as shapes, paths, or compound elements. These elements are displayed on the canvas but organized in
Layers and Element Stacking
Layers help you organize icons into meaningful parts. You can show/hide them individually, rename them, and reorder them for visual hierarchy.
The Layers panel (right side of the workspace) shows all elements in your document, with icons indicating visibility and object type. Selected layers are highlighted and can be edited directly on the canvas. One or more elements can be selected, moved, duplicated, grouped/ungrouped.
Supported File Formats
Axialis IconVectors uses SVG (Scalable Vector Graphics) as its native format, a widely adopted standard for vector-based drawings. The application is optimized for editing small vector assets such as icons, but it is capable of opening and displaying SVG documents of any size or complexity.
When you create or save a document in IconVectors, it is stored in SVG format. However, you can export your icons in other formats such as XAML, VueTS, C++, or bitmap images (PNG, ICO, BMP, etc.).
This approach keeps the editing workflow simple and standards-based, while still offering great flexibility for deployment across different platforms and environments.
Working with Documents
Creating a New Icon Document
To create a new SVG icon, select or press Ctrl+N.
In the dialog, you can define the icon’s width and height in pixels. Enable Keep Aspect Ratio to maintain proportions. You can also choose to set this size as the default for new documents.
Opening an Icon Document
To open an existing SVG icon, use the menu command. Once opened, the icon is fully editable.
– Ctrl+O
– Shift+Ctrl+O
Hint
You can open several SVG icon documents simmultaneously. Each document will open in a new instance of the application.
Closing an Icon Document
To close the current document, select:
– Ctrl+W
This clears the workspace. If the document has unsaved changes, you’ll be prompted to save them before closing. To close the edition window, click the close button at the upper-right corner. This will close the instance associated with this document.
Undo and Redo
Axialis VectorIcons features a full, unlimited Undo/Redo system that allows you to safely experiment and correct mistakes during your editing workflow.
Every action that modifies the document — including drawing, transforming, editing paths, changing properties, and deleting elements — is recorded and can be undone or redone at any time.
Undo and Redo Commands
Undo: Reverts the most recent action.
Redo: Reapplies an action that was previously undone.
These commands are available:
From the Edit menu
Using the toolbar buttons
Via standard keyboard shortcuts: -
Ctrl+Zfor Undo -Ctrl+Yfor Redo
Scope of Undo/Redo
All modifications that affect the document are included in the undo history, such as:
Creating or deleting elements
Moving, scaling, or rotating objects
Editing shapes and paths
Changing fills, strokes, gradients, and effects
Grouping or ungrouping items
Converting shapes to paths
Pasting or importing objects
Note
Undo/Redo operates on the entire document, not just the currently selected elements.
There is no fixed limit to the number of undoable actions — you can freely step back through your editing history as far as needed.
User Preferences
You can access the Preferences window by pressing F2 or choosing .
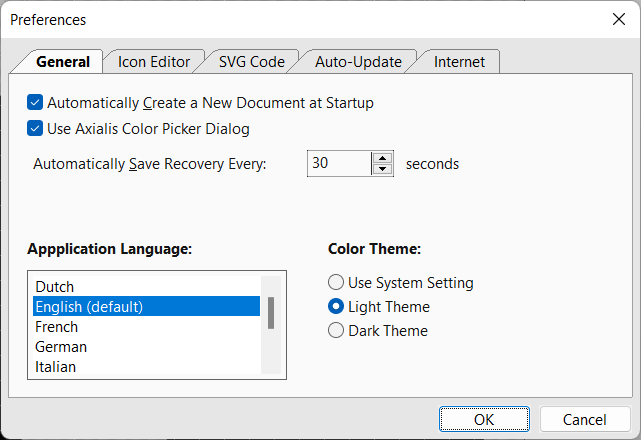
Here you can configure:
Startup behavior
Language
Interface theme (Light, Dark, or System default)
Auto-recovery interval
Additional preferences are available in tabs for:
Icon Editor behavior (grids, transparency, tooltips)
SVG code formatting and minification
Update settings
Proxy configuration
Quick Start Sample Icons
When you install IconVectors, a collection of sample icons is added your Documents\Axialis IconVectors folder. We recommend that you open them to learn how icons are built using geometric elements, paths and organized in layers. You can also use them as templates for your own projects
Here is the list of Axialis Vector Icons provided freely as sample:
Axialis Universal Pro Emoji - Icons from the Axialis Universal Pro icon sets (26 sets, 6245 icons, 279 Overlay badges)
Axialis Flat Design - Icons from the Axialis Flat Design icon sets (16 Sets, 2640 Icons, 100 Overlay badges)
Axialis Fluent Pro - Icons from the Axialis Fluent Pro 2018 icon sets (25 sets, 4123 icons, 146 Overlay badges)
Axialis Fluent System - Icons from the Axialis Fluent System 2023 icon sets (27 sets, 4454 icons, 230 Overlay badges)
Axialis Fluent System Overlays - Overlay badges from the Axialis Fluent System 2023 icon sets (27 sets, 4454 icons, 230 Overlay badges)
Axialis Line Pro - Icons from the Axialis Line Pro 2025 icon sets (5 sets, 1230 icons, 100 Overlay badges - still in production…)
Axialis Office Pro - Icons from the Axialis Office Pro 2019 icon sets (27 sets, 6365 icons, 234 Overlay badges)
Hint
If you installed the Axialis Shell Extension during setup, you’ll see live SVG thumbnails for these icons directly in File Explorer.