Lesson 2.8 - Creating an install package
We've learned how to compile a project and create a SCR screensaver. However, installing this screensaver on a computer could be a bit difficult for an unexperienced user. That's why we recommend you to create an install package with your screensaver especially if you wish to redistribute it. In this lesson we'll learn ho to compile the screensaver (like we did in previous lesson) and create an install package during the same procedure. Creating an installation package is done in 9 steps:
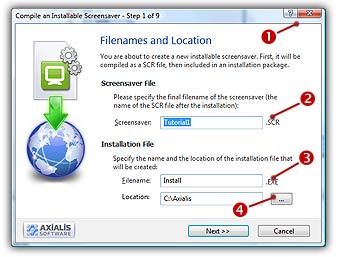
Step 1 of 9 - Filenames and location
1. Choose Make Installation (Shift+F4). A dialog box opens (see below).
2. In the Screensaver field (![]() ), specify the name of the SCR file to create (do not specify the SCR extension). Keep the proposed name "Tutorial2". This is the filename that will be installed on the end-user computer. This file will not be created on your computer during this compilation. It will be embedded in the install package.
), specify the name of the SCR file to create (do not specify the SCR extension). Keep the proposed name "Tutorial2". This is the filename that will be installed on the end-user computer. This file will not be created on your computer during this compilation. It will be embedded in the install package.
3. In the Filename field (![]() ), specify the name of the Install file to create (do not specify the EXE extension). Enter this filename: "Tutorial2Install". In the Location field (
), specify the name of the Install file to create (do not specify the EXE extension). Enter this filename: "Tutorial2Install". In the Location field (![]() ), specify the folder where you want to create the install file on your computer. You can use the button [...] to browse your folders. When done, click Next.
), specify the folder where you want to create the install file on your computer. You can use the button [...] to browse your folders. When done, click Next.
Step 2 of 9 - Installation package properties
4. A new dialog box opens (see below). In the Language field (![]() ), select "Automatic (based on Windows settings)". You can here choose the desired language for the screensaver and install procedure. 8 languages are supported: English, French, Spanish, German, Portuguese, Italian, Dutch and Russian. By selecting Automatic, the install procedure will choose the language by itself based on the end-user Windows language. You can also force a specific language.
), select "Automatic (based on Windows settings)". You can here choose the desired language for the screensaver and install procedure. 8 languages are supported: English, French, Spanish, German, Portuguese, Italian, Dutch and Russian. By selecting Automatic, the install procedure will choose the language by itself based on the end-user Windows language. You can also force a specific language.
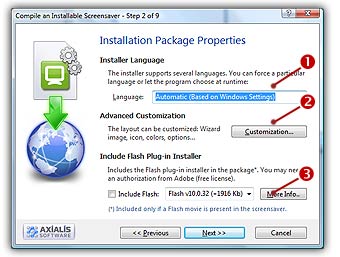
5. Do not change the Advanced Customization settings (![]() ). This is an advanced feature which is not part of this tutorial. See this topic to read more about this feature.
). This is an advanced feature which is not part of this tutorial. See this topic to read more about this feature.
6. Since our screensaver does not include a Flash movie, no need to change the Include Flash plug-in installer option (![]() ). When done, click Next.
). When done, click Next.
Step 3 of 9 - User license agreement
7. The third dialog box opens (see below). It permits you to specify a User License Agreement. If you choose to include a license agreement, the user will be prompted to accept it during the installation procedure. It he refuses it, the install procedure ends. In this tutorial, we'll choose to include the default user license agreement.
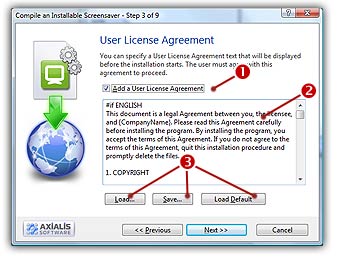
8. Choose the option Add a User License Agreement (![]() ). In the edit zone below you see the default agreement (
). In the edit zone below you see the default agreement (![]() ). It is multi-languages. This is only a proposal that you can customize (
). It is multi-languages. This is only a proposal that you can customize (![]() ). See this topic to read more about this feature. When done, click Next.
). See this topic to read more about this feature. When done, click Next.
Step 4 of 9 - Screensaver Information
7. A new dialog box opens (see below). In the Title field (![]() ), keep the proposed title "Tutorial1". We always recommend you to keep the proposed title (which is the one you specified when you created the screensaver).
), keep the proposed title "Tutorial1". We always recommend you to keep the proposed title (which is the one you specified when you created the screensaver).
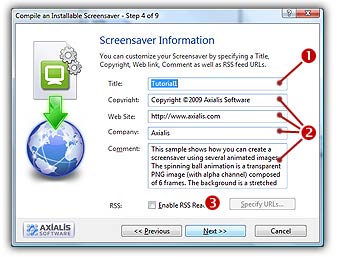
7. Specify your own data in Copyright, Web Site, Company and Comment fields (![]() ). See context help [?] for more information on these fields.
). See context help [?] for more information on these fields.
8. Do not modify the RSS settings (![]() ). RSS is an advanced feature which is not part of this tutorial. See this topic to read more about this feature. When done, click Next.
). RSS is an advanced feature which is not part of this tutorial. See this topic to read more about this feature. When done, click Next.
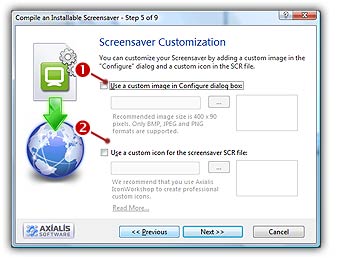
Step 5 of 9 - Screensaver Customization
9. A new dialog box opens (see below). Do not modify the Customization settings. This dialog box is used to customize the icon (![]() ) of the screensaver as well as the image (
) of the screensaver as well as the image (![]() ) displayed in the configure dialog box. This is an advanced feature which is not part of this tutorial. See this topic to read more about this feature. When done, click Next.
) displayed in the configure dialog box. This is an advanced feature which is not part of this tutorial. See this topic to read more about this feature. When done, click Next.
Step 6 of 9 - Splash screen
10. A new dialog box opens (see below). A splash screen is a small window that will be displayed for short period of time before the Screensaver starts. This feature permits you to display the name of the screensaver, your name, a copyright notice or the logo of your company. See this topic to read more about this feature. In this tutorial, we choose to display a Text splash screen. It will display the name of the screensaver and the copyright notice (you specified in Step 2).
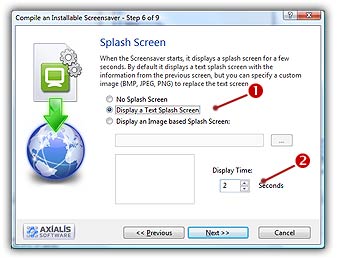
11. Choose the option Display a Text Splash Screen (![]() ). In the Display Time group (
). In the Display Time group (![]() ), specify 2 seconds. The splash screen will be displayed as text for 2 seconds. When done, click Next.
), specify 2 seconds. The splash screen will be displayed as text for 2 seconds. When done, click Next.
Step 7 of 9 - Preview window
12. A new dialog box opens (see below). You can specify here the kind of preview you wish for the screensaver. The preview window is displayed in the Windows Control Panel when (you change of screensaver). See What is a screensaver topic for more info (see "How to install a screensaver"). In this tutorial, we choose to display an Animated Preview of the screensaver. You'll see a real preview of the slideshow!
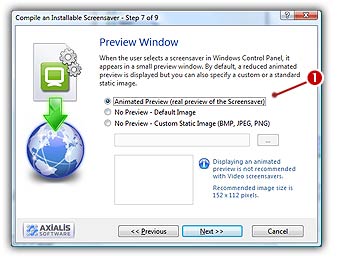
13. Choose the option Animated Preview (![]() ). When done, click Next.
). When done, click Next.
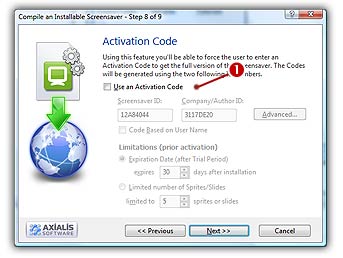
Step 8 of 9 - Activation code
14. A new dialog box opens (see below). Do not modify the Activation code settings. This dialog box is used to create demo or limited versions of your screensavers. This is a useful feature if you want to sell your screensavers. This is an advanced feature which is not part of this tutorial. See this topic to read more about this feature. When done, click Next.
Step 9 of 9 - Ready to go
15. A new dialog box opens (see below). This is the last screen before the compilation starts. Nothing to specify here. Just take a look at the compilation summary. If something is wrong, you can go back to the previous screens by clicking Previous button. Also, read the information about Copyright.
16. When done, click Next.
Compilation and test
17. A dialog box opens in which you see the compilation in progress (a few seconds). If a problem occurs during the compilation, you see an error message. If it worked fine, the following screen is displayed:
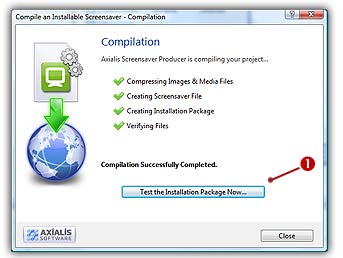
18. You can test the installation package now. Click on the Test the Installation Package Now button (![]() ). The install procedure starts, just follow it. It will install the screensaver on your computer. This is exactly whet the end user will do. Convenient, isn't it? Click Close to finish.
). The install procedure starts, just follow it. It will install the screensaver on your computer. This is exactly whet the end user will do. Convenient, isn't it? Click Close to finish.
The tutorial is done
We hope you enjoyed the creation of this first screensaver. If you want to see if the project you've done is correct, you can open our version to compare them: "...\Axialis Librarian\Screensavers\Tutorials\Tutorial2.ssp".
We also have two other similar tutorials to show you how to create sprite and flash screensavers... Have fun!