Create an animated cursor from several images
In relation to Axialis CursorWorkshop, this article offers information on the following topics:
- Selecting the image files in Axialis CursorWorkshop
- Creating the animated cursor from these images
- Setting the hot spot
An animated cursor is composed of several frames that are displayed in sequence to produce the animation, each frame containing a different image. To get more information about cursors, see this topic: What is a cursor.
In this tutorial, we'll see how to make a new animated cursor project from several static images. Each image will be used as a frame in the animated cursor. This methode is useful when you have created the animation using an external application and generated a list of images.
Other methods are available to create animated cursors from existing documents. See the following topics:
- Create an animated cursor from an image
- Create an animated cursor from a filmstrip
- Create an animated cursor from an animated GIF
- Create an animated cursor from a FLI/FLC animation
- Create a rotating animated cursor from an image
Selecting the image files in Axialis CursorWorkshop
1. Choose "File/New/File Browser" or press Ctrl+Alt+O. A built-in Axialis File Browser window opens.
2. Browse your disk to open the folder containing your image files. For example "My Documents\Axialis Librarian\Cursors\Tutorials". The image files are listed in the right pane 1:
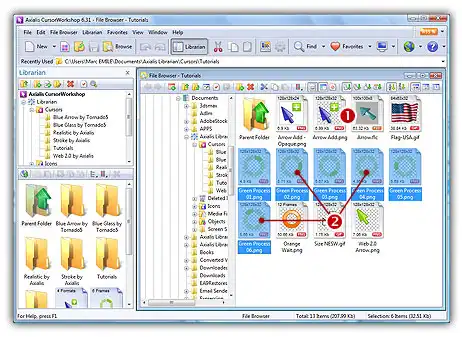
3. Select the image files 2.
Creating the animated cursor from these images
4. Choose "File Browser/New Animated Cursor from this Image" or press "I". A dialog box opens:
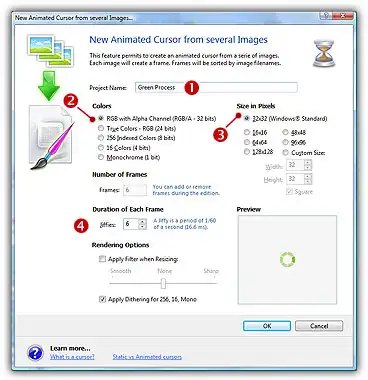
5. In Project Name 1, specify "Green Process". In Colors 2, choose "RGB with Alpha Channel". In Size in Pixels 3, choose "32x32 Windows Standard". In Jiffies 4, specify "6" which is the display delay of each frame in 1/60 sec. Since there are 6 image files, the number of frames is set to 6 and cannot be changed.
You can also apply or not the dithering option to the 256/16 color images as well as add a filter effect to smooth/sharpen the resulting images in RGB/A mode (see the results in the preview images).
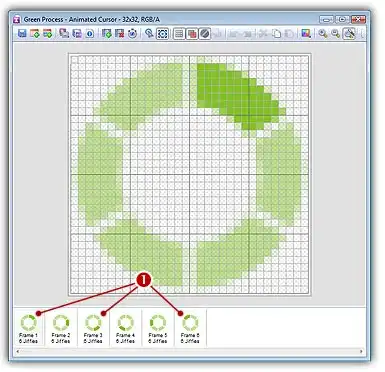
6. When done, click OK. The cursor is automatically created with all the frames added automatically. You can click on the different frames 1 to see the results in the editor window. The preview 1:1 windows permits also to see the animation.


The hot spot of a cursor is the point to which Windows refers in tracking the cursor's position. By default, the hot spot is set to the upper-left corner of the cursor (coordinates 0,0). But you can set the hot spot anywhere in the drawing area of the cursor (see What is a Cursor for more info).
1. Select the first format in the list. For example 32x32 RGB/A.
2. In the editor area, the hot spot is shown as a square slowly blinking from white to black. If you don't see the hot spot, activate the visualisation: choose Draw/Show Cursor Hot Spot or press Ctrl+K.
3. Select Draw/Set Cursor Hot Spot or press K. Click to the location of the hot spot..
4. The new location flashes for a short moment. The new hot spot location is now defined.