Customize icons in Office toolbars
In relation to Axialis IconWorkshop, this article offers information on the following topics:
- Creating the toolbar icon in IconWorkshop
- Customizing the icon in the Microsoft Office toolbar
- Using large icons in Office Toolbars
- Using Stock Icons to customize Office Toolbars
Learn how to customize icons in Microsoft Office programs. The procedure is strictly identical for all the applications of the suite: Microsoft Word, Excel, Access, PowerPoint...
The standard image size for the Office toolbar icons is 16x16. However, you can change settings to display icons in large mode 32x32 (see below). To get more information on Icons and image sizes , we recommend you to read this topic: What is an Icon?
Creating the toolbar icon in IconWorkshop
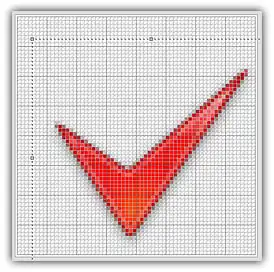
In this first part of the tutorial, we'll create a replacement icon for the button "Spelling and Grammar" using IconWorkshop. Our goal is to create 16x16 and 32x32 image formats. This icon is composed of 2 parts: A text part "ABC" and a red check symbol:

1. Choose File/New/Icon Project or press Ctrl+N. A new dialog box opens. Axialis IconWorkshop supports both Windows and Macintosh icons (see format comparison to learn more). We'll use a Windows icon in this tutorial. Select the Microsoft Windows Icon Project option. Click OK, another dialog box opens.
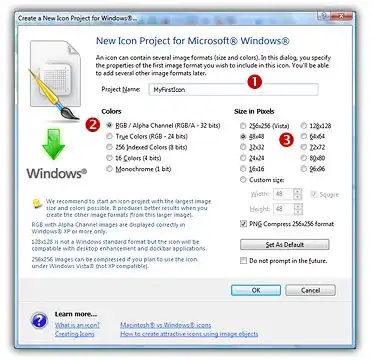
2. In the Project Name edit zone 1, enter any icon project name. Do not specify an extension.
3. In the Colors group 2, select: XP with Alpha Channel (RGB/A - 32 bits). This format uses an additional Alpha Channel to create smooth shades and object borders (see what is an icon to learn more).
4. In the Size in Pixels group 3, choose: 64x64. This is easier to draw a large image then create the other image formats from this one. Additionally, the smaller formats will be created with better results (shrinking an image always produces better results). Click OK, the dialog box closes and a new icon document is created.
Important
To follow the next steps, the "Preserve Transparency" option must be set (press "T" or select Draw/Preserve Transparency). If this option is not set, the transparency will not be kept each time you add a new image object and the objects already added will be fully replaced.
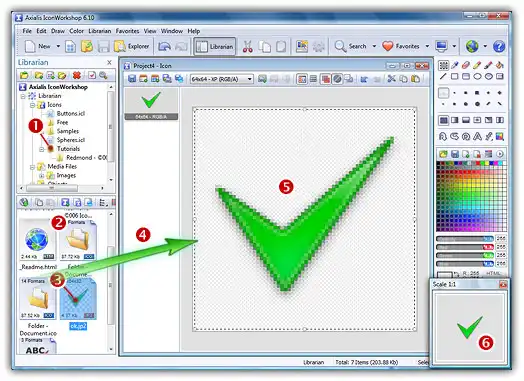
5. Now let's add the red check object. Open the Librarian window, go to the folder "Objects\64x64" 1, the folder contents appears in the list below 2, select the file "Ok.jp2" 3. When done, use a mouse Drag-and-Drop to add it into the project as shown above 4. The object is added to the project as a floating selection 5. See the quality in the scale 1:1 preview window 6:
6. Let's change the check object to red. To do so, IconWorkshop has a feature to adjust the Hue/Saturation/Brightness of an image. Choose Draw/Adjustments-Effects/Hue-Saturation or press "U". A dialog box opens:
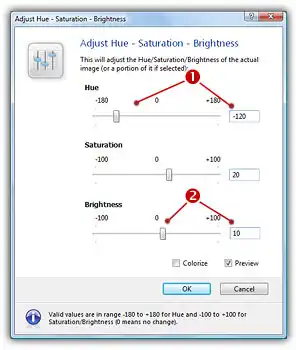
7. Set the Hue to "-120" either using the slider or by typing the value 1. It "shifts" the colors of the floating image in the spectrum. As a result, the symbol is now red. Also, we slightly increase the Saturation by "20" and the Brightness by "10" 2. You can see the results in real-time if you selected "Preview". When done click OK. Now the check symbol is red:
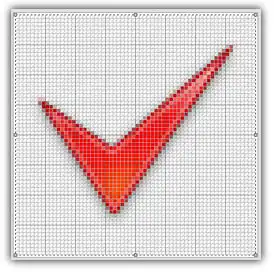
8. Let's move the symbol 6 pixels down and 4 pixels right. You can do this by using a mouse drag-and-drop from inside the red portion of the symbol but we recommend you to use the keyboard which is a more precise way to proceed. Hit the Down Arrow key 6 times, then hit the Right Arrow key 4 times. The result should look like this:
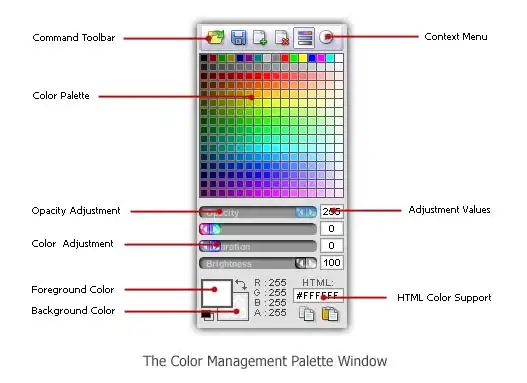
9. Now let's add the text. First we need to select the color of the text body using the color management window (usually docked to the right border of the main window). In the Color Palette, select the "10% Gray". Be sure the Opacity is "255" (see Opacity Adjustement):
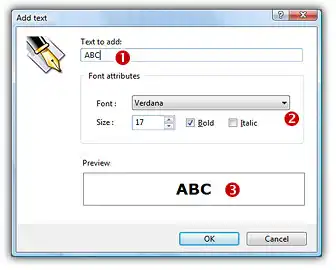
10. Choose "Draw/Add Text (Ctrl+T)". In the dialog box (see below), type the text "ABC" 1. In Font Attributes group, select "Verdana", size 17, Bold 2. The preview should be as shown below 3.
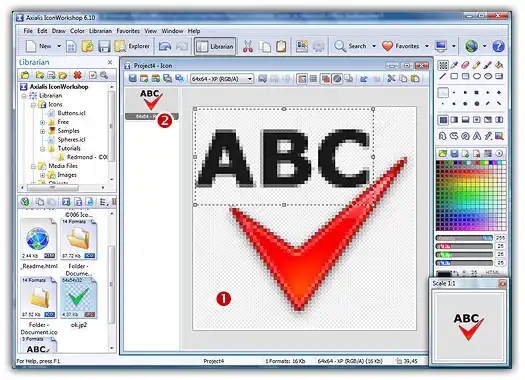
11. When done, click OK. A new floating object containing the text has been created. We don't want to move the text, so click anywhere outside the text to apply the floating selection (location 1 below for instance). The result should now look like this:
12. In Microsoft Office toolbars, only formats 16x16 or 32x32 are used. So, let's create these 2 formats from the actual image we've just made. This is done in one step with IconWorkshop Corporate Edition (if you own the personal edition, create the other formats individually). Right-click on the image we've just created in the list (see 2 above). A menu opens, select "Add Several Image Formats from this Image".
13. A large dialog box opens. Select the formats "32x32 - XP" and "16x16 - XP" 1. Be sure to unselect all the other formats 2. Also, remove the option "Apply Filter when Resizing" 3:
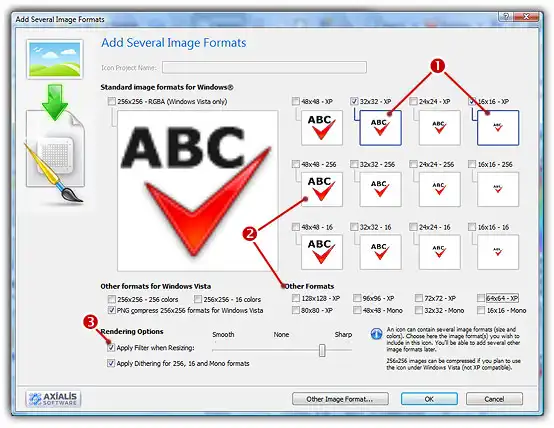
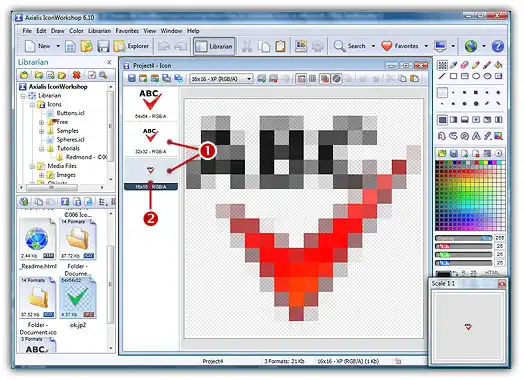
14. When done, click OK. The new formats have been added to the icon project (see 1 below). Now we recommend you to save your work in a permanent file ICO file.
If you want to verify your work, the icon can be opened in the Librarian folder "Icons/Tutorials/Spelling.ico".


Customizing the icon in the Microsoft Office toolbar
15. Select the icon format you wish to use for the Office toolbar customization. In our case we need the 16x16 format (see 2 above ).
16. In the menu, choose "Edit/Copy".
17. Start the Microsoft Office application that you want to customize. In this tutorial, we'll customize the "Spelling and Grammar" button of Word. So let's launch Microsoft Office Word.
18. Once the Word application is opened, be sure the toolbar "Standard" is displayed. If this is not the case, right-click in any toolbar and select "Standard". Now the toolbar is displayed.
19. In the menu of Microsoft Word, choose "Tools/Customize". A dialog opens but we won't use it directly. Once this dialog is opened, a special menu is accessible when you right-click on any button of the toolbars displayed in the program (NOT in the dialog box).
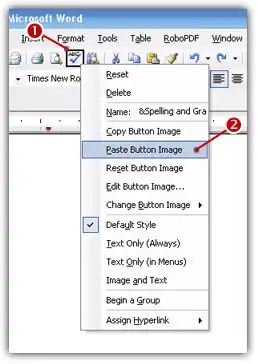
20. Right-click with the mouse on the toolbar button "Spelling and Grammar" 1. A menu opens, select "Paste Button Image" 2:
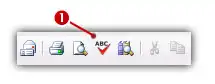
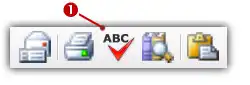
21. Close the dialog box "Customize". You're done! The button image has been updated 1, congratulations!
Using large icons in Office Toolbars
By default, the icons in Office toolbars are 16x16. With the high screen DPI of new LCD displays, sometimes it's difficult to see the icons in the toolbars. You can setup Office to display icons in 32x32 format
1. In the Office menu, select "Tools/Customize". A dialog box opens, select the "Options" tab. In "Other" section select "Large Icons".
2. All the toolbars switch automatically in large 32x32 mode. The problem is that the icons are displayed in a 16x16 zoomed format, not in native 32x32 resolution which is not very nice!
3. To get slick button images, restart from step 15 above and select the 32x32 image format in IconWorkshop. The result should look like shown below 1. Much better!
Using Stock Icons to customize Office Toolbars
Drawing small and easy-to-distinguish icons requires some skills and a lot of time. A time-saving solution is to use Stock Icons. These icons, which have been created by professional designers, are sold online and ready to download in minutes. These kind of icon packs are perfect for standard buttons like Open, Save, Close, Print...
Usually these sets are limited but additional custom icons can be created by adding overlays or objects to the icons of the set. This is easily done with IconWorkshop using drag-and-drop (see step 5 above). Many companies on the web now propose Stock Icons.
In the following procedure, we're going to replace the "e-mail" button image of Microsoft Word by the "Mail" icon from IconBuffet "Redmond" icon set.
1. Open the Librarian window, go to the folder "Icons\Tutorials\Redmond - ©2006 IconBuffet" and double-click on the icon "mail_16.ico" in the list below 1.
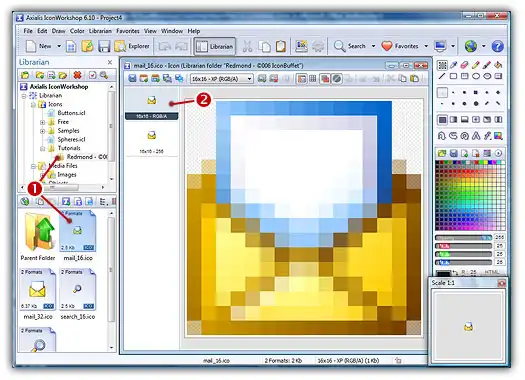
2. The icon opens in a document window. Be sure to select the format "16x16 - XP" 1. From this point, the procedure is similar to steps 15 to 21 (seen above):
3. In the menu, choose "Edit/Copy".
4. Start the Microsoft Office application you want to customize. In this tutorial, we'll customize the "email" button of Word. So let's launch Microsoft Office Word.
5. Be sure the toolbar "Standard" is displayed. If this is not the case, right-click in any toolbar and select "Standard". The toolbar is displayed.
6. In the menu of Microsoft Word, choose "Tools/Customize". A dialog opens but we won't use it directly. Once this dialog is opened, a special menu is accessible when you right-click on any button of the toolbars displayed in the program (NOT in the dialog box).
7. Right-click with the mouse on the toolbar button "email". A menu opens, select "Paste Button Image".
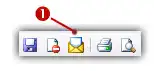
8. Close the dialog box "Customize". The button image has been customized 1:
8. If you want to practice, do the same by replacing the "Research" Word button image by the "search_16.ico" icon from IconBuffet. Also, 32x32 versions are available if you want to test the resulting quality in large toolbar size.