Work Efficiently With Photoshop to Create Screensavers
In relation to Axialis Screensaver Producer, this article offers information on the following topics:
Adobe Photoshop is the industry standard in image creation. That's why we made a Photoshop plug-in that will permit you to transfer your images directly to Axialis Screensaver Producer without creating temporary PSD image files. This great feature will permit you to work efficiently and create high quality screensavers.
To get more information on the Photoshop plug-in, see this topic.
1. The first time you've started the application, you probably have been prompted to install the plug-in (if Photoshop was installed). If you did not choose to install this plug-in or installed Photoshop later, please follow step 2. Otherwise, go to step 6.
2. Before installing the plug-in we recommend you to close the Photoshop application (if it is actually opened in background). Choose File/Install Photoshop Plug-in...
3. The dialog box Install the Photoshop Transfer Plug-in opens (see below). In the Location edit zone 1, specify the Photoshop plug-in folder. If you don't know the exact folder path, click the browse button 2 to choose the folder in a list.
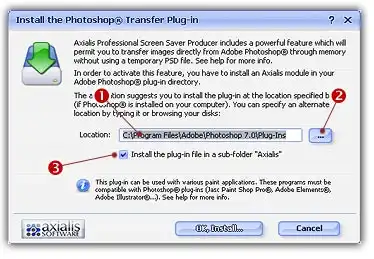
4. If you want to create a subfolder "Axialis" to install the plug-in module (recommended to organize your folder properly), activate the option "Install in a subfolder Axialis" 3. Note that creating a subfolder may fail with some compatible applications.
5. Click OK. When done, a message informs you that the plug-in has been installed.
Note
You can install the Plug-in in various other compatible applications. See your application help file for more info on how to proceed. If Photoshop is installed on your computer, the plug-in folder will be automatically added to the edit zone.


6. Using Photoshop, create your image like shown below 1. For better results we recommend you to create an image with smooth transparency 2. For example the image below is featured with a cyan outer glow. Only the selected layer contents will be transferred 3.
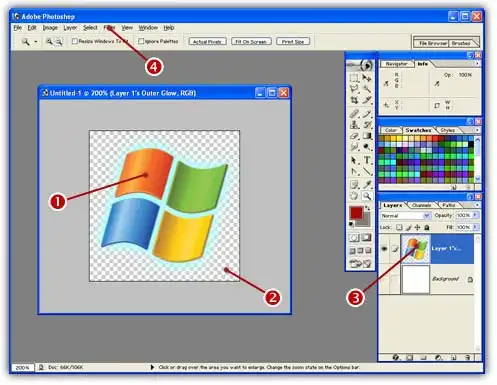
7. In the menu 4, select Filter/Axialis/Transfer To Axialis Professional Screen Saver Producer. The Axialis application automatically starts (or activates if already running in background) and a dialog box prompts you to choose an action:
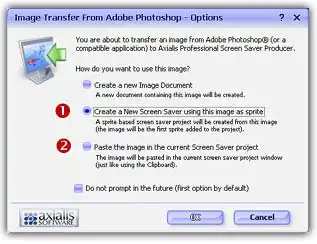
8. Choose Create a New Screen Saver using this image as sprite option 1 to create a new screensaver. By choosing this action, you'll add this image as the first sprite in the screensaver. If you want to add this image in an existing (and already opened) screensaver project, select Paste the image option 2.
9. For example, choose Create a New Screen Saver and click OK. A second dialog box opens. Specify the requested information (title, author...) and Click Next. A new screensaver is created with the image added as sprite:
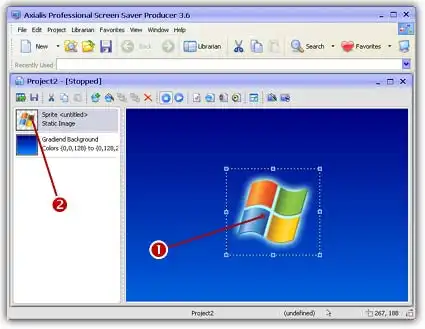
10. The sprite is added in the center of the edit window 1 and is also visible in the sprite list 2. Now you can adjust the sprite properties: motion, size & position, collision, transparency... To learn more about sprite screensavers, we recommend you to follow this tutorial.