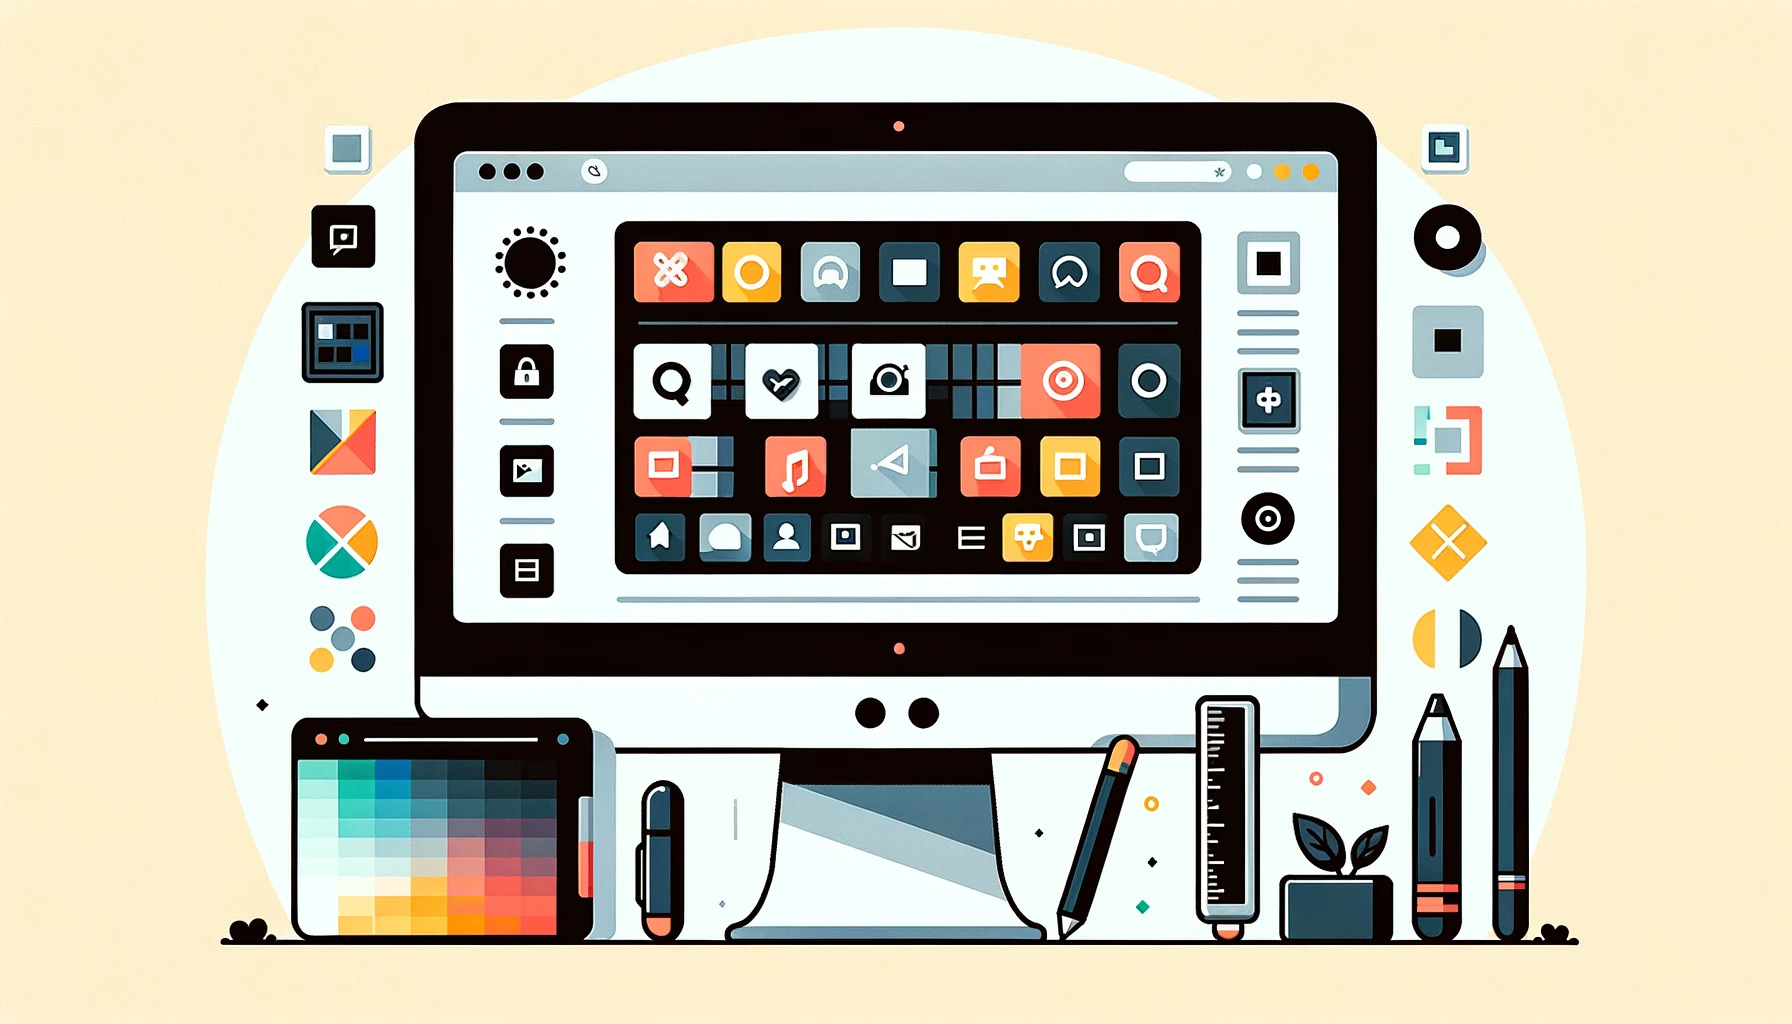


Creating custom icons for your application can give it a unique and polished look. It’s also a great way to make your app stand out from the rest. In this guide, we’ll walk you through the options of creating custom icons for your app and offer tips on how to make them look professional and effective. You’ll also learn how to create quality icons for your application using Axialis IconGenerator.
Why it is Important to Create Quality Icons in Applications
In today’s digital world, it is more important than ever to have high-quality, visually appealing icons in your application. Not only are these icons essential to a good user experience, but they can help your app stand out from the competition and create a professional feeling.
In addition, high-quality icons can improve usability and make it easier for users to navigate and interact with your application. They can provide visual cues for different functions, helping users understand how to use your product more effectively.
On the other hand, using overly standardized icons for very specific functions can be confusing for users. This will affect their user experience and negatively impact their perception of your product from the first time they use it.
Investing in high quality custom icons can be a very profitable investment for your application.
Consistency, Compatibility & Style
When creating icons, it is important to consider not only the design of individual icons, but also how they will be used as a group in the context of the overall user interface. A consistent approach to icon design greatly improves the user experience of an interface.
Consistency means using the same icons for similar actions or concepts on different sections of the product, as well as designing the icons in a consistent manner (size, proportions, line thickness, etc…).
Icons must be compatible with industry standards. Some functions such as open, save, edit, etc. have standards that must be found in your icons. You can be creative with icons that represent specific functions of your application, but with care.
You should also define a style that is consistent with the product’s application area. All icons in a product, or group of products, should have the same style. This refers to the visual design of the icons, including their shapes, colors and other visual elements.
Therefore, you need to choose the right style for your application, based on existing industry standards, for example:
- Outline, Monochrome: for professional and industrial apps;
- Flat, Colorful: for home and general public apps;
- Microsoft Office: for desktop and office apps;
Vector or Raster Icons?
As a developer, you are probably asking yourself the question: Vector or raster icons?
Vector icons are created using mathematical equations to define the shapes and lines that make up the icon. They are resolution independent, which means they can be scaled to any size without loss of quality. This makes them ideal for use on high resolution screens. The common file formats used in applications for vector icons are SVG and XAML.
Raster icons, on the other hand, are composed of pixels and have a fixed resolution. They are resolution-dependent, which means that if you enlarge them, they become pixelated. The common file formats for raster icons are PNG and ICO.
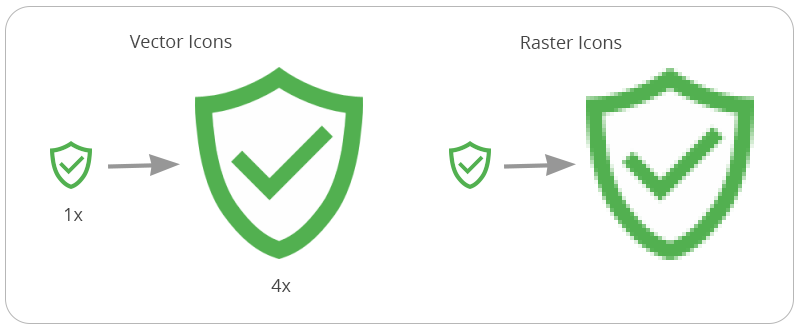
So if you want your application to be compatible with all screen resolutions, you should opt for vector icons. However, it is important to keep in mind that your vector icons must be Pixel Perfect in order to be displayed correctly in your GUI, especially in low resolutions. This is the difference between “illustration” icons and “user interface” icons. The latter must be created with this constraint: be aligned on a defined grid to be displayed correctly on all resolutions.
Pixel Perfect Vector Icons are the best choice for modern and evolutive applications.
Did you say “Pixel Perfect”?
Yes, it is essential to use pixel perfect icons to implement them in your application GUI. A pixel perfect vector icon is aligned on a predefined grid according to its native size.
If for example the native size of your icon is 16×16, it means that it is displayed with a size of 16×16 pixels on a low resolution screen (96 DPI). This will produce a blurred result if it is not “pixel perfect”:
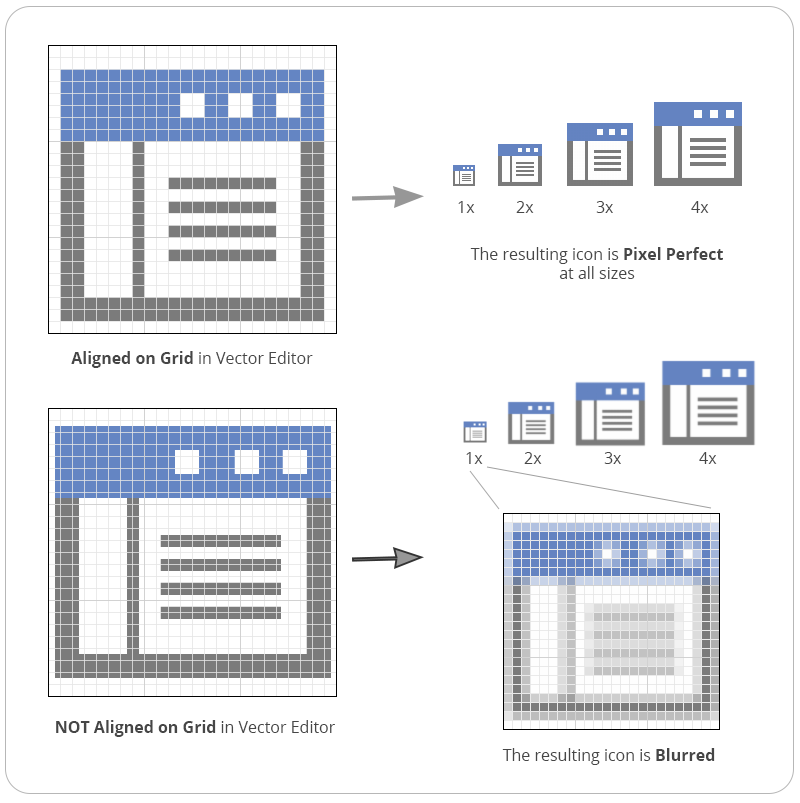
The display problem will be less visible on high resolution screens. Nevertheless, a professional application should be compatible with all types of screens, requiring the use of pixel perfect icons.
Be sure to create pixel-perfect vector icons aligned on grids.
Several Sizes, Even for Vector Icons
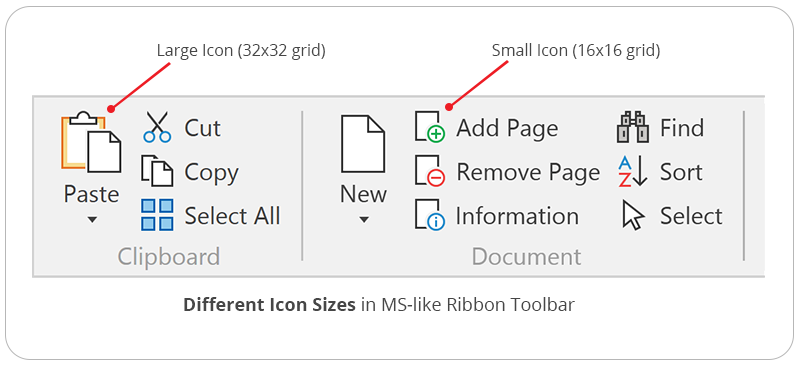
Depending on its location in the User Interface, an icon will have a different native size. Here are the most common sizes used in applications:
| Icon Location in User Interface | Native Size |
| Menus & MS-like Ribbon (small icon) | 16×16 |
| Application Toolbar | 24×24 |
| MS-like Ribbon (large icon) | 32×32 |
Therefore, when you make custom icons for your application, you need to carefully select the native sizes needed for your user interface. For example, if you’re using MS-like Ribbons, you must create two groups of icons in small (16×16) and large (32×32) sizes:
When creating a set of icons for an application, it’s important to remember that creating multiple sets of icons in different sizes can take more time and money.
Carefully choose the icon native sizes needed for your user interface.
Different Options to Create Quality Icons
There are several ways to create custom icons, depending on the specific requirements of your project and your own skills:
Create icons from scratch using a vector editor:
This is the most flexible option, but it also requires the most time and skill. The most famous vector design programs are Adobe Illustrator, Sketch and Inkscape (free).
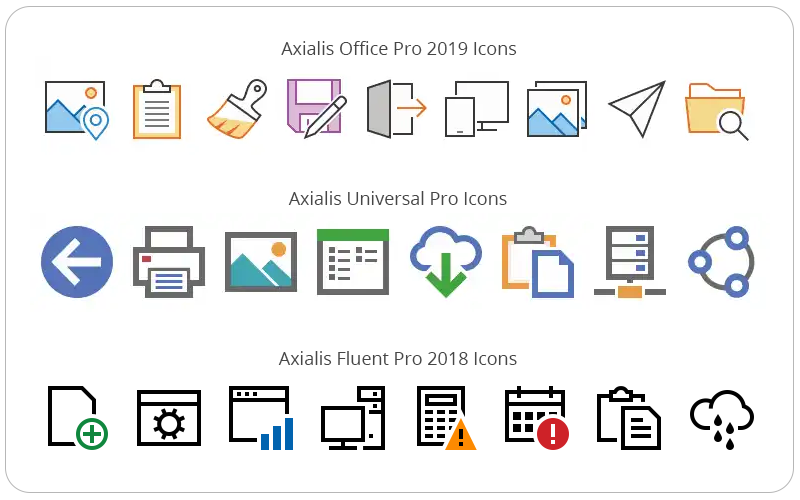
Use pre-made icons picked from large libraries:
You can find millions of icons on websites such as Iconfinder, The Noun Project and Flaticon. Search your icon, download it and customize it with a vector editor. Those icons are rarely pixel perfect and better for illustration purpose.
Use an icon generator software:
This option doesn’t require much drawing skill or experience. These programs, such as Axialis IconGenerator, usually include a library of pre-made icons that you can use as is. They provide tools for customizing them (colors, overlay modifiers, etc) and let you easily create pixel perfect icons for your application in a consistent style. Many sets in various themes are usually available. However, if you don’t find the exact icon in the available sets, you can edit/create your own.
Hire a designer to create custom icons:
If you want to create custom icons but don’t have the skills to do it yourself, you can hire a designer. This is the perfect-result option, but (very) expensive.
Using an icon generator software is the easiest and most affordable way to create pixel-perfect vector icons for your application.
How to Create Quality Icons with Axialis IconGenerator
Axialis IconGenerator lets you create Pixel-Perfect Vector Icons for your Application in the style of your choice with ease. This can be done in a few minutes:
- Create a new collection.
- Select the icon set in the desired style
- Choose the icon you want to generate in the list. Optionally, you can add an overlay modifier and choose where to apply it. You can also colorize the icon and/or the overlay.
- Add the icon to the collection. This can be done by drag & drop as well.
- Click “Create Collection Icon Files“. Choose where to generate the icons and select the formats you want to generate. Click OK.
- The icon are generated. Now you can explore the folder where it is located and use them in your application project.
The Application Icon
The application icon is different from those used in the user interface. It is the one that the user will see in the operating system to represent your application. It is usually a 100% custom image in the style of the operating system.
It must have a special format which must contain different sizes imposed by the operating system. For example, Windows imposes the following formats in pixels for application icons:
- 16×16 – RGBA
- 20×20 – RGBA
- 24×24 – RGBA
- 32×32 – RGBA
- 40×40 – RGBA
- 48×48 – RGBA
- 60×60 – RGBA
- 64×64 – RGBA
- 80×32 – RGBA
- 96×96 – RGBA
- 256×256 – RGBA
- 16×16 – 256 colors
- 32×32 – 256 colors
- 48×48 – 256 colors
- 64×64 – 256 colors
- 16×16 – 16 colors
- 32×32 – 16 colors
Here is a snapshot of the Microsoft Excel application icon. It contains all the necessary image formats to comply with Windows requirements:
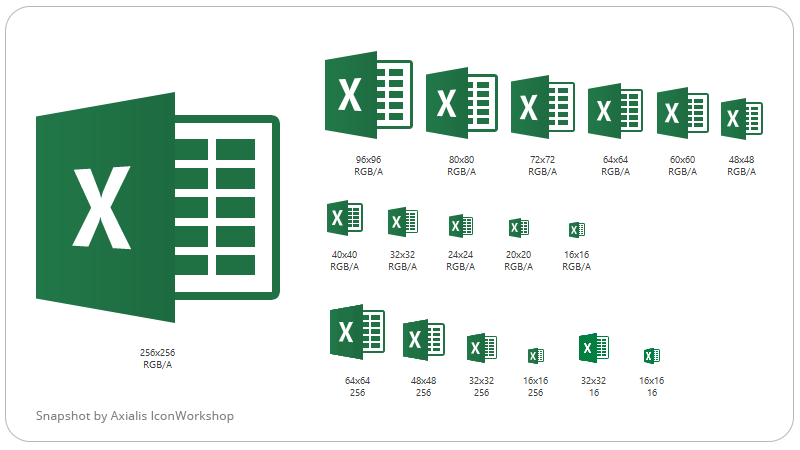
The format used to store all those image formats in a single file is ICO. This file is a container of raster images in different sizes and color depth.
You need a specific authoring program, such as Axialis IconWorkshop, to generate this icon format. The program can automatically generate all these formats from a single source image, usually the larger one. You may need to retouch the smaller sizes in order to make them pixel-perfect, like this was done by Microsoft team on the Excel icon.
Conclusion
Designing icons for applications can be a time-consuming and expensive undertaking. Ensuring consistency and selecting the appropriate style for icons is essential. Vector creation and pixel-perfect design are crucial when creating icons for applications. A cost-effective option is to use icon generator software to produce high-quality icons.