Workflow
IconGenerator supports two complementary workflows:
Generate directly from the database (fast for a one-off export or a small batch).
Build an icon collection (best for projects, repeatable exports, and long-term maintenance).
The screenshot below shows the main workspace. The numbered areas are referenced in the steps that follow.
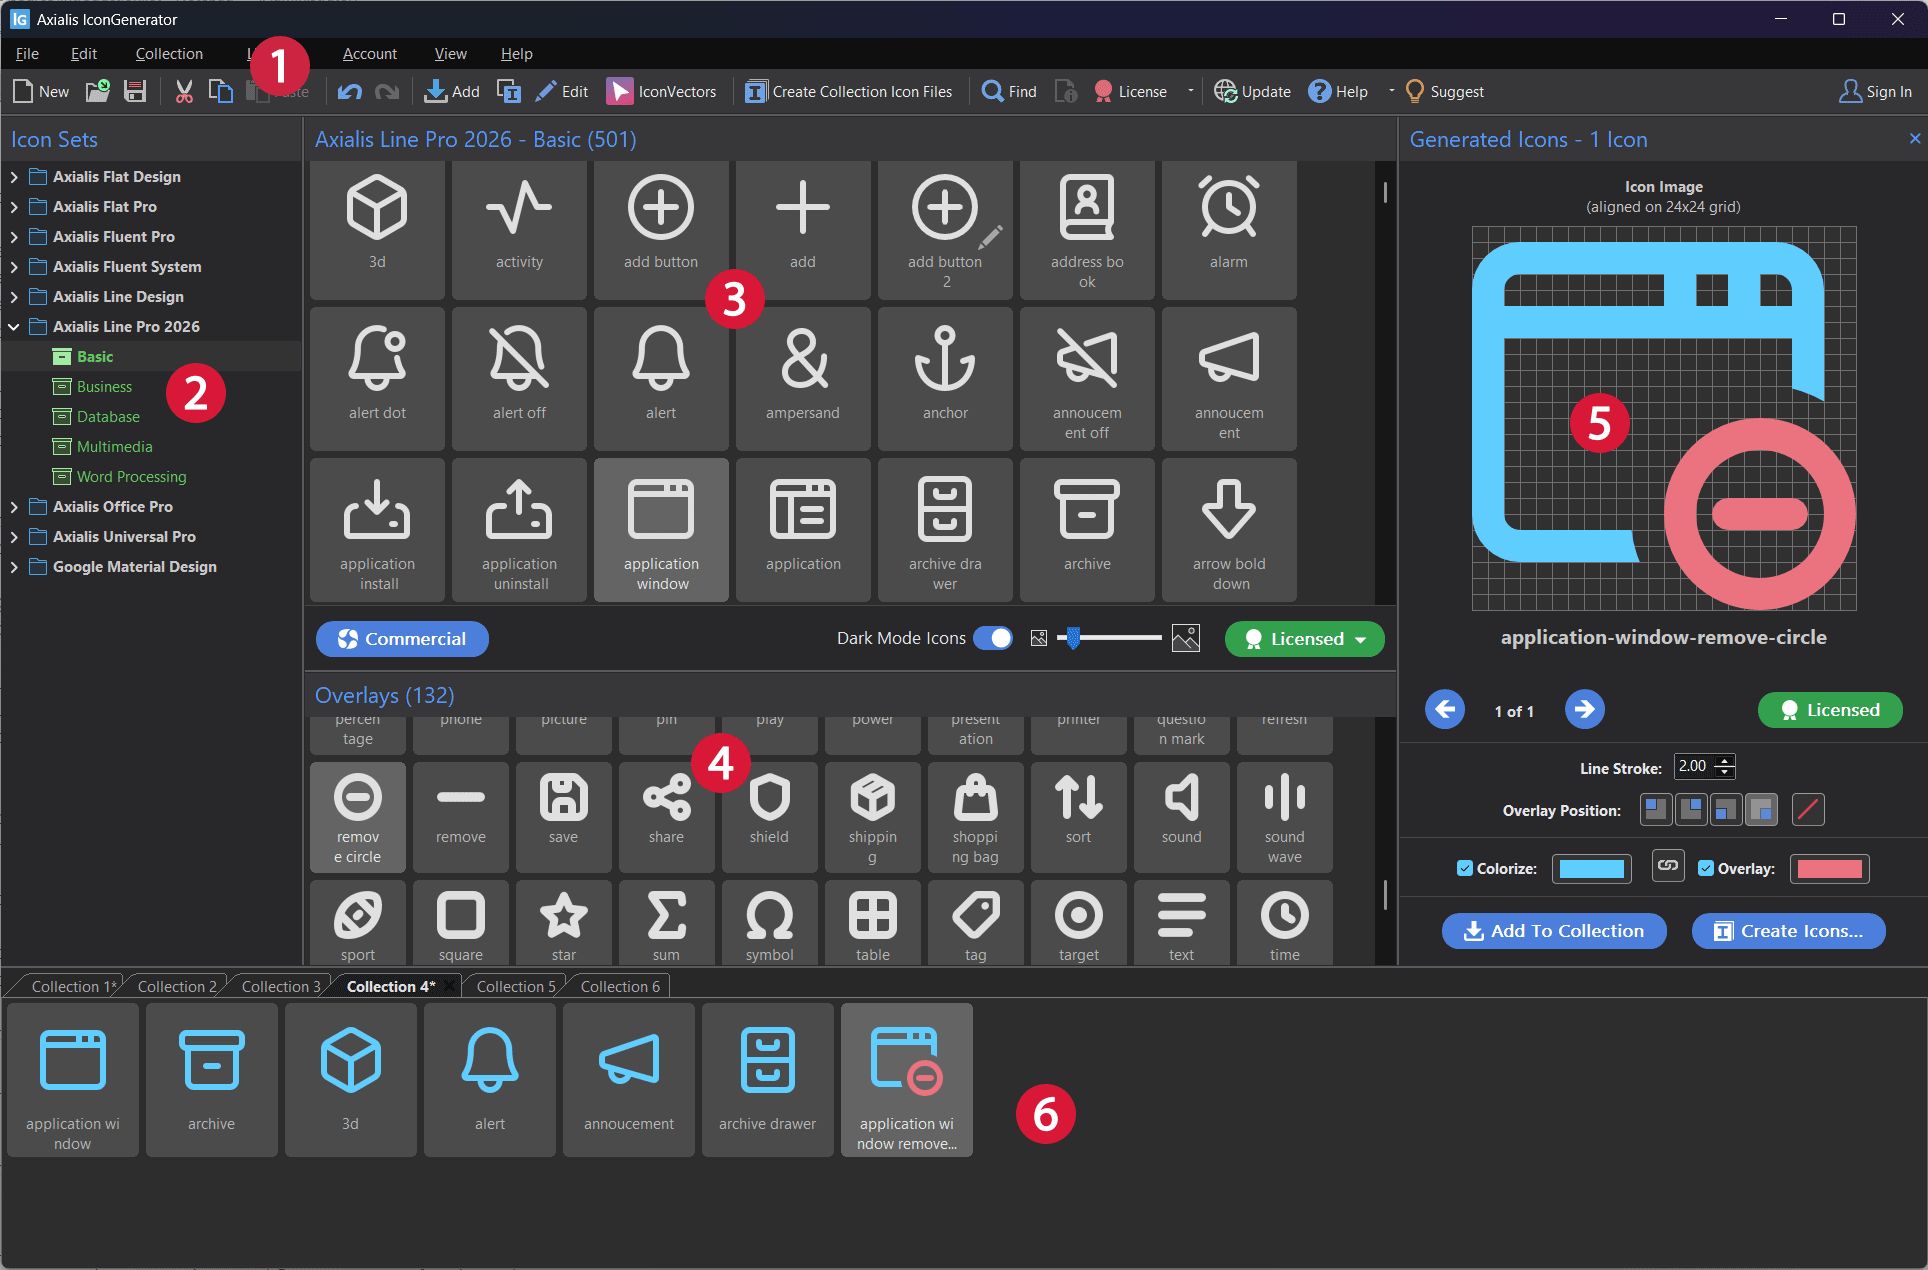
Main workspace (numbers match the references used in the workflows).
The numbering used in this chapter:
① Menu bar and toolbars
② Icon Sets panel
③ Icon list
④ Overlays panel
⑤ Generated Icons panel
⑥ Collections area (tabbed documents)
Generate icons directly from the database
This workflow is ideal when you want to quickly export icon files without creating a collection.
In the Icon Sets panel ②, choose an icon set and browse to a category.
In the icon list ③, select one or more icons.
(Optional) In the Overlays panel ④, select an overlay to illustrate an action or state.
Review the results in the Generated Icons panel ⑤.
Export the generated icons directly to files on disk:
F3
This command generates icon files from the current selection (icons and overlays) and writes them to the destination folder you choose.
Tip
Overlay position shortcuts are focus-dependent:
F5 to F8 apply to the selected icons in the Collections area ⑥ when the collection has focus.
Otherwise, they apply to the selection in the Generated Icons panel ⑤.
Quick actions from the Generated Icons panel
For one-off exports or quick reuse, you can use the context menu in the Generated Icons panel ⑤:
Right-click inside the Generated Icons panel ⑤ to open the context menu.
Use:
Save Image As… (save a single generated icon)
Copy Image As… (copy SVG/XAML code or a bitmap representation to the clipboard)
Build an icon collection
Collections are used to keep a curated set of icons for a project (file extension .AXICP).
Once a collection is built, you can generate consistent outputs again and again.
Create a new collection:
Ctrl+N
(Or open an existing collection with Ctrl+O.)
Add icons to the collection:
Select icons (and optionally overlays) from the database using ②, ③, ④.
Add the generated icons to the current collection:
Ctrl+W
Organize the collection (optional):
Apply or adjust overlays inside the collection (optional):
F5
F6
F7
F8
Save your collection:
Ctrl+S
(to save a copy under a new name)
Generate icon files from the collection (batch export):
F4
Specify icon file formats and options
When you export icons to disk (for example using ), IconGenerator displays a dialog where you choose the destination folder, file formats, sizes, and options.
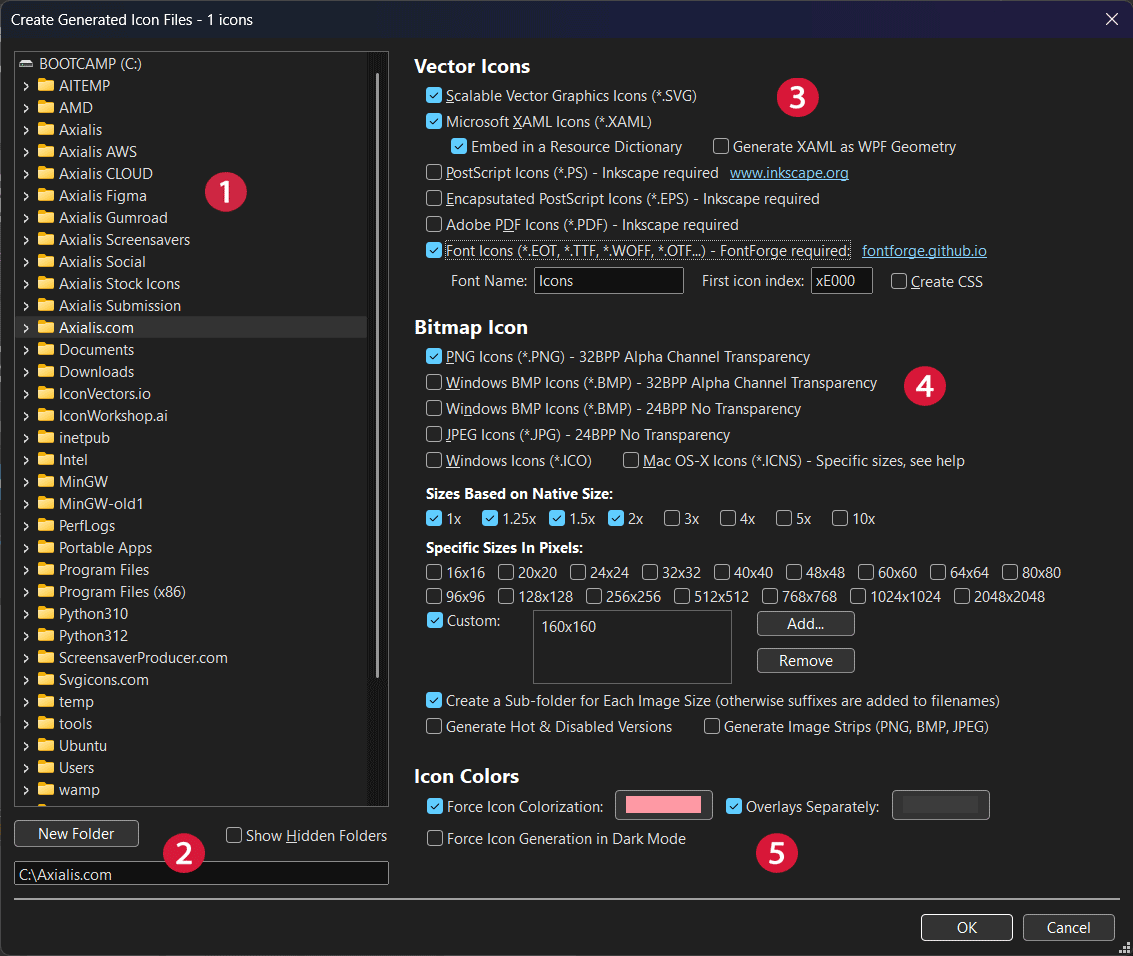
Create Generated Icon Files dialog (numbers match the steps below).
Select the target folder (①) Browse the folder tree to choose where icon files will be created.
Or create one (②) Use New Folder if you need to create a dedicated output directory.
Select the vector file formats (③) Choose one or more vector outputs such as SVG or XAML. Some formats may require external tools (for example Inkscape for PS/EPS/PDF, depending on your configuration).
Select the bitmap file formats and sizes (④) Choose bitmap formats (such as PNG, BMP, JPEG, ICO, ICNS), then select the sizes you want to generate (native-size multipliers, specific pixel sizes, and custom sizes).
Set additional options (⑤) Configure options such as icon colorization, overlay generation, dark mode generation, subfolders per size, and image strips (when supported).