Workspace overview
This chapter describes the main window and how IconGenerator is organized.
Main window layout
IconGenerator uses a multi-panel layout:
Menu bar ① : access application commands (File, Edit, Collection, Licenses, Account, View, Help).
Toolbar ① : quick access to common actions (new/open collection, find, update, create icon files, etc.).
Icon Sets panel ② : a tree view listing all available icon sets and categories.
Icon list ③ : shows the icons of the currently selected set/category.
Overlays panel ④ : shows overlay symbols (actions/states) available for the current style.
Generated Icons panel ⑤ : preview and customization controls for the currently generated icon.
Collections ⑥ : a tabbed area containing one or more open collection documents.
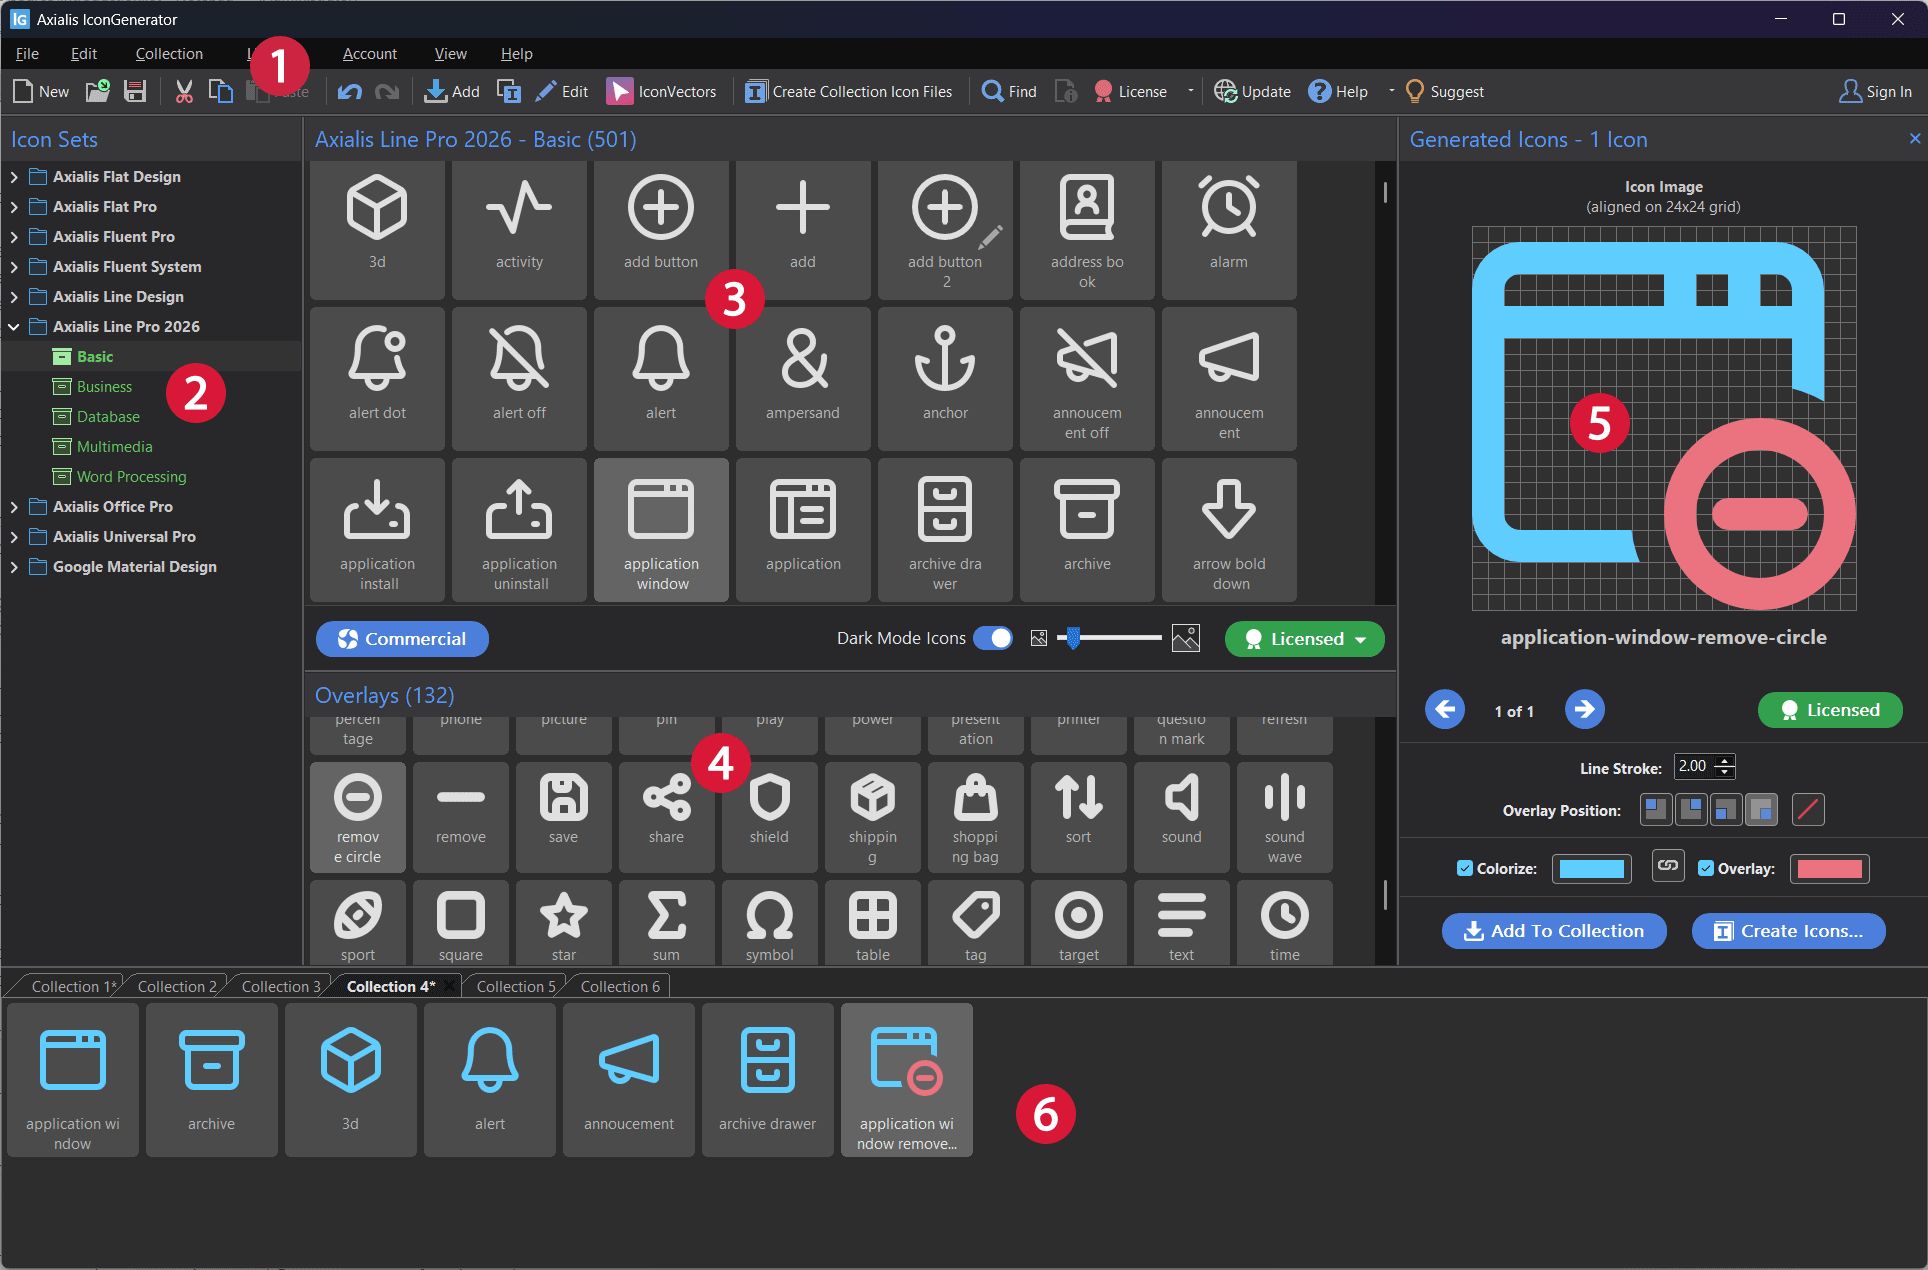
The main window showing the different parts and panels of the main IconGenerator window.
Icon Sets panel
Use the Icon Sets panel to pick a family/style. Some icon sets expose categories (e.g. Basic, Business, Database).
Tips
If an icon set is not fully licensed, IconGenerator may restrict what can be exported (depending on license type).
Some features (dark mode variants, line stroke, shaded colorization, etc.) may be available only for specific sets.
Icon list
The icon list is the main area where you select icons to generate:
Use Ctrl to select multiple icons.
Use Shift to select a range.
Generated Icons panel
The Generated Icons panel displays a large preview and common options, such as:
Browse buttons (when multiple generated icons are available).
Overlay position (four corners).
Colorization controls (icon color and/or overlay color).
Line stroke (for line-based icon sets, when supported).
Add To Collection and Create Icons actions.
Collections Panel
Collections are tabbed documents (extension .AXICP) used to manage a project’s icons.
You can keep multiple collections open at the same time.
Show / hide panels
IconGenerator uses several dockable panels. If you need more room for the icon list or the preview, you can hide panels you do not need and show them again later.
You can toggle panels from the View menu:
(shortcut: F11)
(shortcut: F12)
Note
Panel visibility commands are toggles: selecting the same command again shows the panel back.
Move / undock panels
Some panels/area can be undocked and moved outside of the main window. This is especially useful when you work with multiple displays (for example: keep the generated icons on a second monitor).
To undock a panel:
Grab the panel by its title bar (or tab, depending on the panel).
Drag it away from the main window until it becomes a floating window.
Move and resize it as needed.
To dock it again, drag the floating panel back toward the main window edges and release it when the docking preview is shown.
Restore default window positions
If your workspace layout becomes difficult to use (panels moved off-screen, overlapping, or arranged in an unexpected way), you can restore the default layout.
Use:
Tip
This command is safe to use anytime. It restores panel placement but does not modify your icon collections.